
Part 4 of this tutorial is available here.
Thank you node
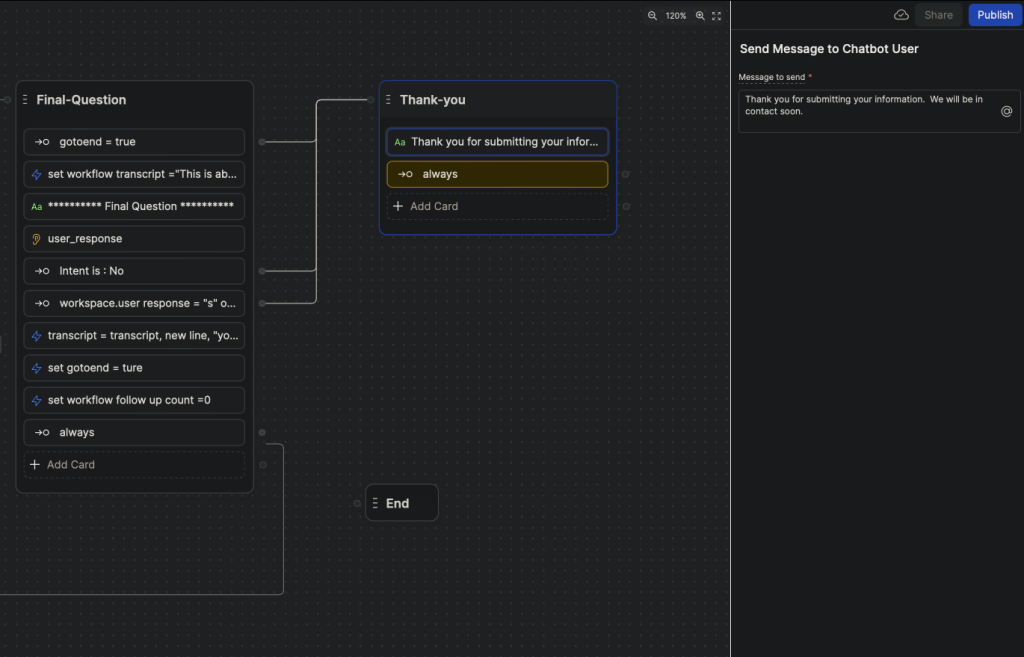
Now when the ‘Final Question’ node is ready we can proceed with ‘Thank you’ node. It has a single function, to display a thank you message.
Let’s add a new Standard node near the ‘Final-Question’ node. Let’s call the new node ‘Thank-you’.
Then we add to the node a text card with the following message to send:
Thank you for submitting your information. We will be in contact soon.
After the text card we add a new ‘Expression’ card with a label ‘always’.
That is it, the ‘Thank-you’ card is ready. Now we should connect ‘Final-Question’ node expressions to the ‘Thank-you’ card.
This is where the interaction between the user and the chatbot would normally end and conversation details and evaluation summary would be send to HR. However, in this template, for the demonstration purpose, the evaluation data is printed out to the chat window.
Basic details
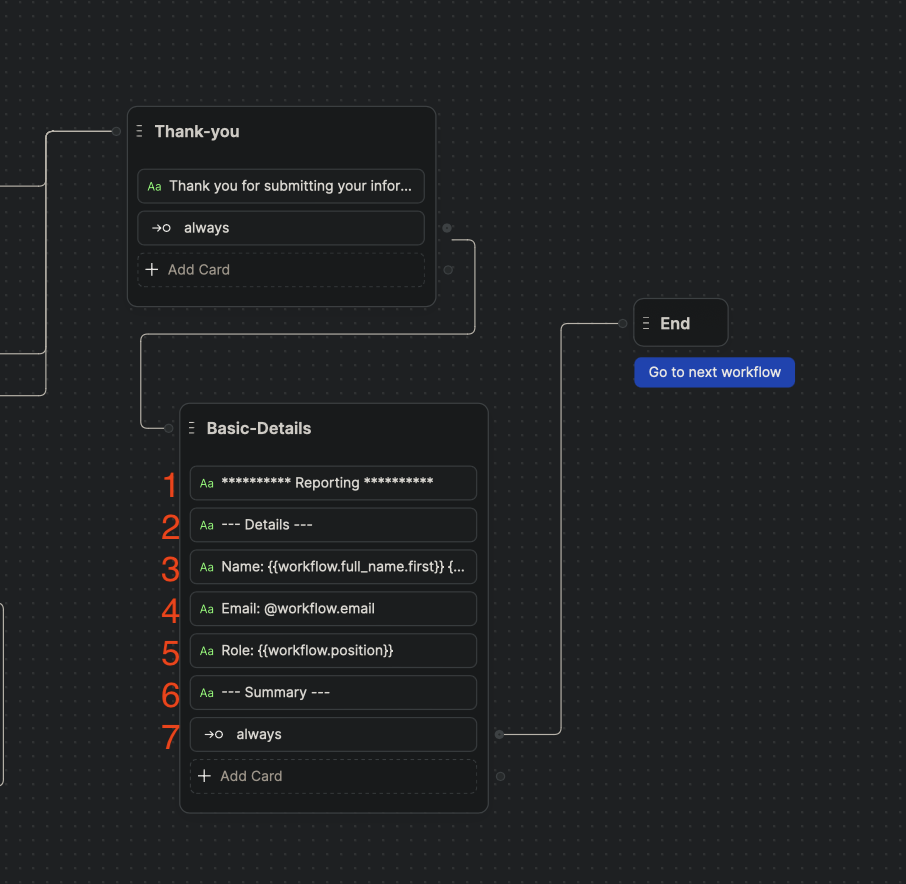
Next we add ‘Basic-Details’ node. This node prints out a basic information about the candidate, such as Name, Email, and Role.
- Text card. Message to send:
********** Reporting ********** - Text card. Message to send:
— Details — - Text card. Message to send:
Name: {{workflow.full_name.first}} {{workflow.full_name.last}} - Text card. Message to send:
Email: @workflow.email
I assume @ and {{}} are equivalent here. - Text card. Message to send:
Role: {{workflow.position}} - Text card. Message to send:
— Summary — - ‘Expression’ card. Label: ‘always’.
Evaluation
Next comes the final node, ‘Evaluation’ node. This node prints out AI summaries for all 3 topics. It also prints an average score. And, finally, AI evaluates all the summaries and comes up with one single evaluation.
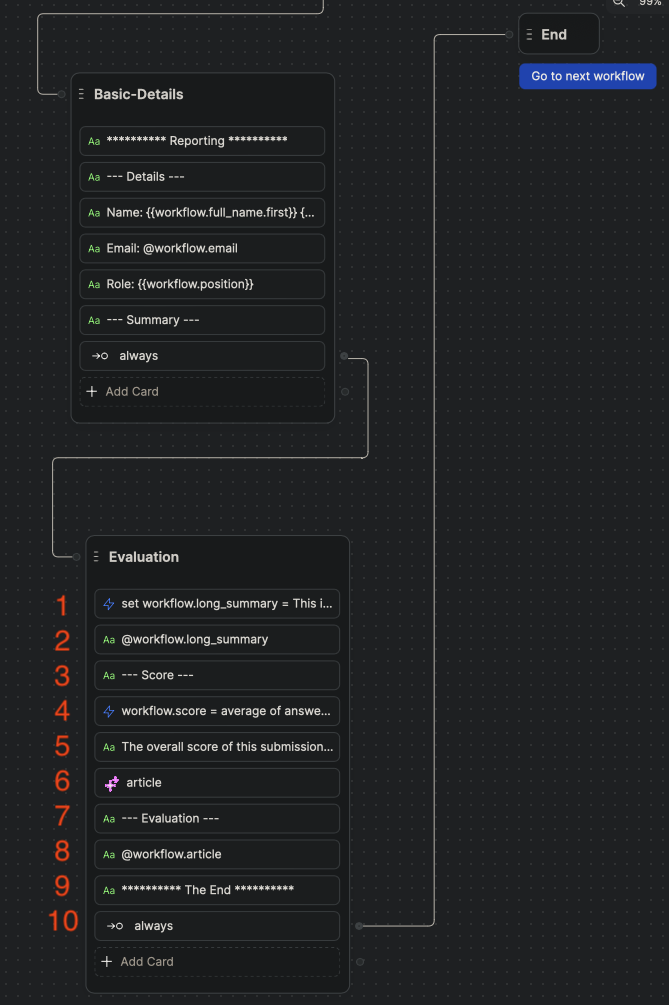
1. First, let’s add long_summary variable of type String.
Then we add ‘Execute code’ card which will combine user’s short overview as well as AI summaries for all 3 topics. On the right side in the card’s settings menu enter the following command in the field ‘Generate code’:
set workflow.long_summary = This is the candidate overview:” workspace.overview “.”, new line, all the elements of summary with line breaks between them
This will generate the following code:
const overview = workflow.overview;
const summary = workflow.summary;
const lineBreak = '\n';

workflow.long_summary = `This is the candidate overview: ${overview}.${lineBreak}${summary.join(lineBreak)}`;
2. Let’s print the long summary. Add text card with the following ‘Message to send’:
@workflow_summary
3. Then add a text card with the following ‘Message to send’:
— Score —
4. Before we calculate the average score let’s add a variable to store it. Add score variable of type String.
Then we add ‘Execute code’ card which calculates an average score based on AI scores for 3 topics. On the right side in the card’s settings menu enter the following command in the field ‘Generate code’:
workflow.score = average of answer rating (converted to a number) formatted to 1 decimal place
This will generate the following code:
const answerRatings = workflow.answer_rating.map(rating => parseFloat(rating))
const averageRating = _.mean(answerRatings)
workflow.score = averageRating.toFixed(1)
5. We print the average score. Add a text card with the following ‘Message to send’:
The overall score of this submission was: {{workflow.score}} / 10
6. Here we ask AI to make an evaluation based on long_summary. First, let’s add article variable of type String.
Then we add ‘AI task’ card. In the ‘Task Instruction’ we write the following instruction:
You are a top recruitment analysis. Write a candid and detailed report in plain text on the candidate, carefully and ruthlessly detailing their strengths and weaknesses and recommendation as to whether we continue the process with them or not. Store the entire article in the variable called “article”
In the ‘AI Task Input’ we write the following:
This candidate is applying for {{workflow.position}}
Information
{{workflow.long_summary}}
We store the result in variable workflow.article.
7. Add a text card with the following ‘Message to send’:
— Evaluation —
8. We print out workflow.article by adding a new ‘Text’ card with the following ‘Message to send’:
@workflow.article
9. Add a text card with the following ‘Message to send’:
********** The End **********
10. Add ‘Expression’ card with a label ‘always’
Conclusion
Now the recruitment chatbot is ready. The bot will collect basic information about the candidate. It will then iterate through 3 main topics adding questions proposed by AI. AI evaluates all 3 topics separately and scores them. After the bot goes through all 3 topics the candidate is given a choice to continue with one more topic which he or she thinks is relevant. In the end all the summaries are joint together for AI to make a final evaluation. We also calculate the average score based on scores for each topic. Here the evaluation information is printed out for demonstration purpose,however, in the real case it coud be send straight to HR.
Leave a Reply
You must be logged in to post a comment.