
Part 3 of this tutorial is available here.
Skipping main question
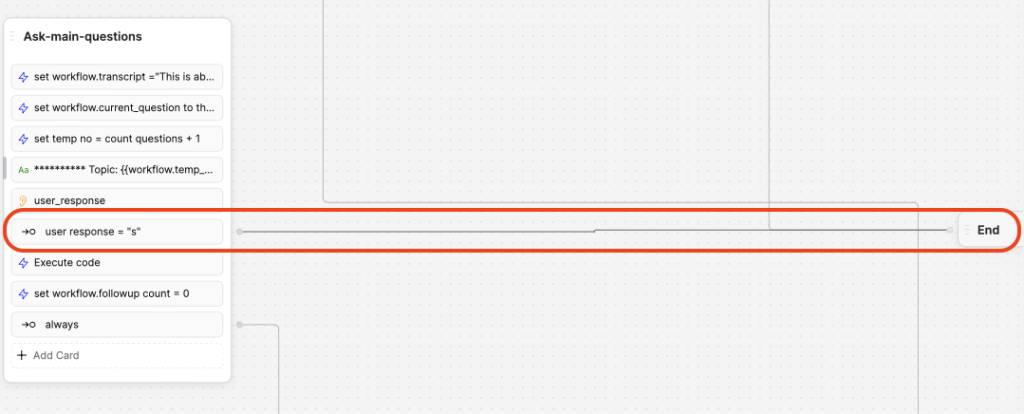
We need to go back to “Aks-main-question” node and add the logic which would deal with the case when user skips one of the main questuion (which is equal to skipping the whole topic) by entering “s”.
Basically we just need to proceed to the next main question (topic) and record empty entries to workflow.summary and workflow.answer_rating for this main question (topic).
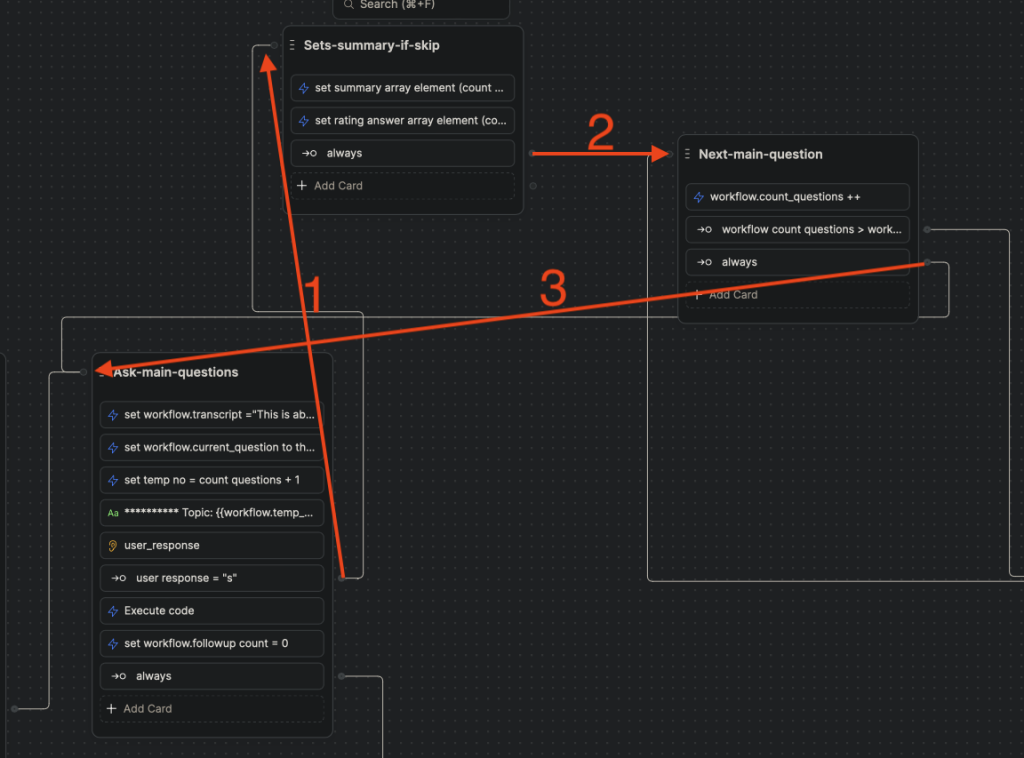
To do so we add a new node and call it “Sets-summary-if-skip”. To this node we add 2 ‘Execute code’ cards, which would record empty entries to workflow.summary and workflow.answer_rating for this main question (topic).
To record an empty workflow.summary variable. From the toolbox select ‘Execute code’ card and drag it to the node. Click on newly added ‘Execute code’ card. On the right side in the card’s settings menu enter the following command in the field ‘Generate code’:
set summary array element (count questions) = “N/A”
This will generate the following code:
workflow.summary[workflow.count_questions] = 'N/A';
To record an empty workflow.answer_rating variable. From the toolbox select ‘Execute code’ card and drag it to the node. Click on newly added ‘Execute code’ card. On the right side in the card’s settings menu enter the following command in the field ‘Generate code’:
set rating answer array element (count questions) = 0
This will generate the following code:
workflow.answer_rating[workflow.count_questions] = 0;Then we should connect Expression card ‘user response = “s”‘ to ‘Sets-summary-if-skip’ node and Expression card ‘always’ from the ‘Sets-summary-if-skip’ node to ‘Next-main-question’ card.
Now we have the logic implemented for skipping a main question (topic).
Final question
Now we are ready to start on ‘Final-Question’ card. After we ran out of main questions (or topics) we proceed to the final question.
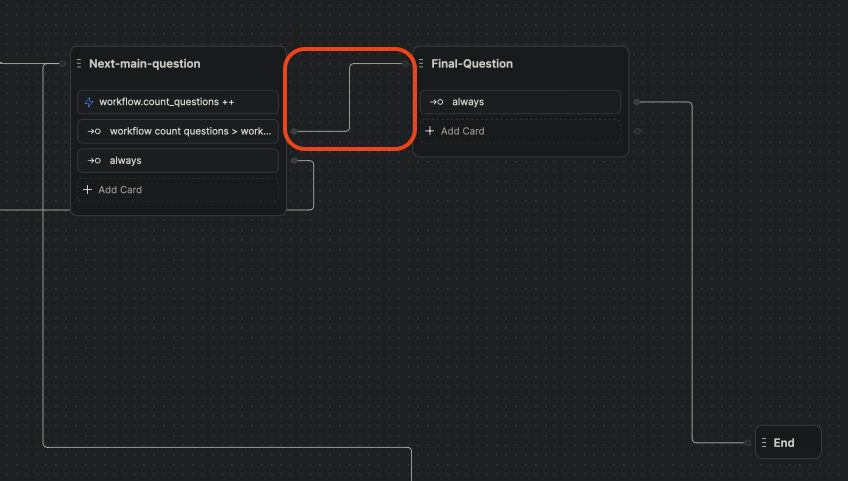
Let’s add ‘Final-Question’ card. We then connect ‘Next-main-question’ card to ‘Final-Question’ card which is then connected to ‘End’ card.
Let’s first add a new variable. Variable name is gotoEnd and type is Boolean.
We then add ‘Expression card’ and in the ‘Labe’ field add:
gotoend = true
This should generate the following condition:
workflow.gotoEnd === trueThis condition is used later. After the user is asked any additional question later in the flow, it is sent streight to the thank you node and not asked again whether or not he/she would like to answer any more questions.
Then we add ‘Execute code’ card. In the card’s settings menu we enter the following command in the field ‘Generate code’:
set workflow transcript =”This is about a candidate who is applying for” workspace.position
This should generate the following code:
workflow.transcript = `This is about a candidate who is applying for ${workflow.position}`We then add ‘Text’ card with the following message to send:
********** Final Question **********
Next we ask a user whether he or she would like to answer more questions. We add ‘Raw input’ card and in the field ‘Question to ask the user’ we type:
Is there anything else you would like us to know that hasn’t been covered here?
We store result in workflow.user_response.
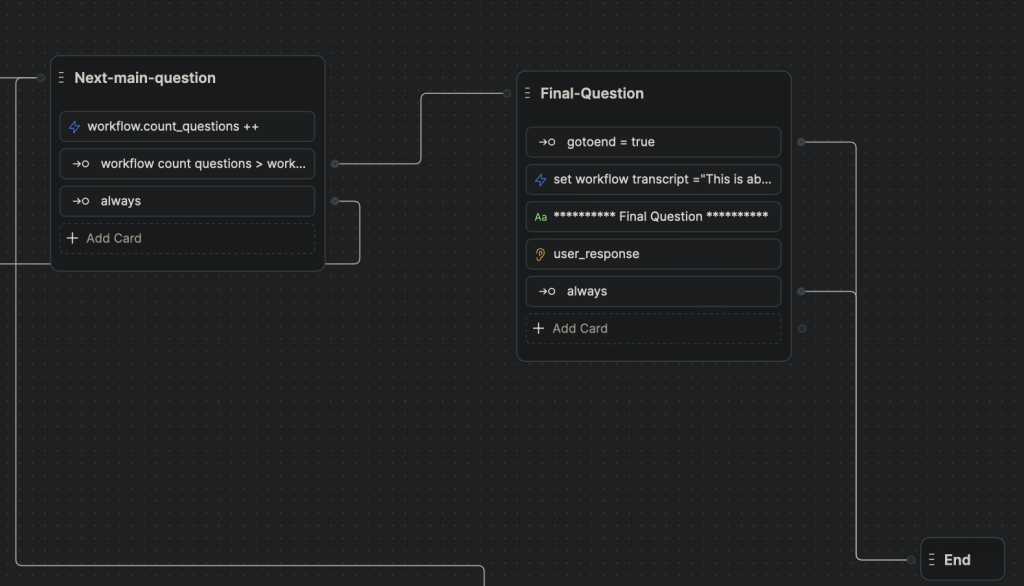
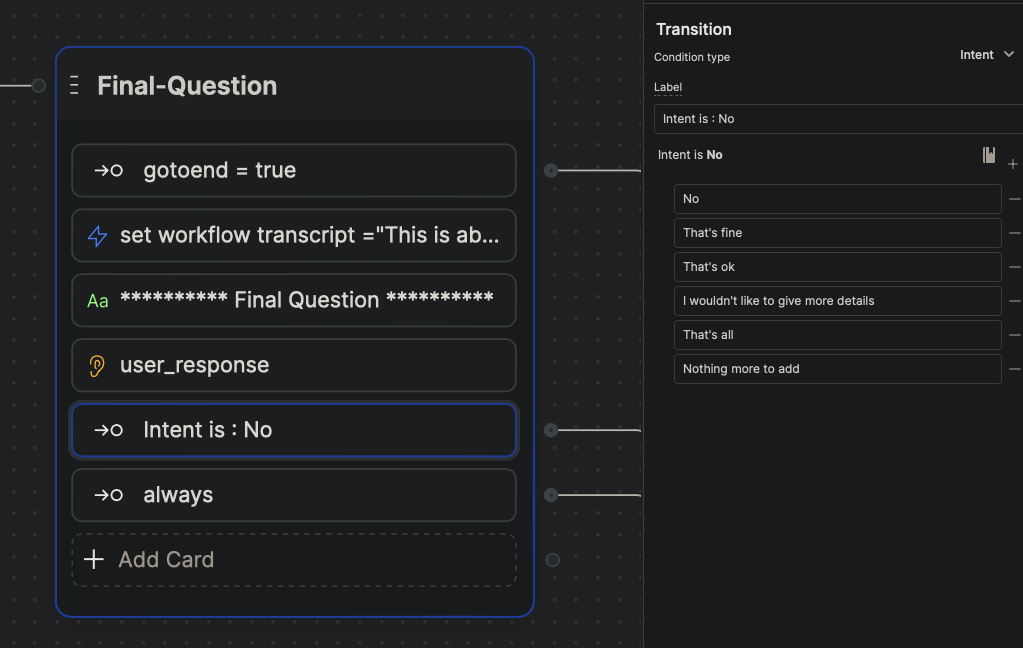
So far the flow looks like on the image below.
If user answers ‘No’ we then proceed to the next node which is ‘Thank-you’ node otherwise we proceed to ‘Follow-up-question’ node to follow up with more questions.
Add ‘Intent’ card to the node. Then add following values to it.
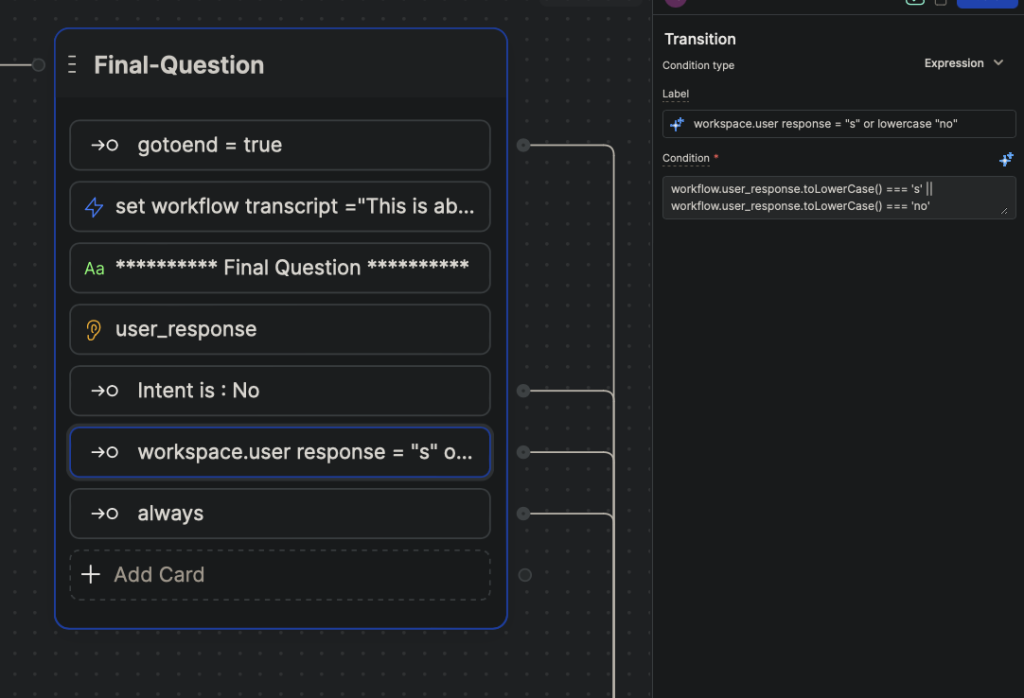
We then also check if user enters ‘s’ or lowercase ‘no’ by adding ‘Expression’ card.
If the user answers something positive, indicating that he or she would like to continue providing additional information, we should record the answer, so later AI can build on top of it.
From the toolbox select ‘Execute code’ card and drag it to the node. Click on newly added ‘Execute code’ card. On the right side in the card’s settings menu enter the following command in the field ‘Generate code’:
transcript = transcript, new line, “you:” current question, new line, “user:”, user response
This will generate the following code:
workflow.transcript += `\nyou: ${workflow.current_question}\nuser: ${workflow.user_response}`In my case it did not generate the proper code, so I just copied the code form the template.
Then we set the value of gotoEnd variable to be True, so next time chat flow reaches Final-Question card the flow proceeds futher straight to tne next card (a ‘Thank-you’ card).
From the toolbox select ‘Execute code’ card and drag it to the node. Click on newly added ‘Execute code’ card. On the right side in the card’s settings menu enter the following command in the field ‘Generate code’:
set gotoend = ture
This will generate the following code:
workflow.gotoEnd = trueWe then set the value of follow_up_count variable to 0, this will allow AI to ask to more questions based on the user proposed additional topic.
From the toolbox select ‘Execute code’ card and drag it to the node. Click on newly added ‘Execute code’ card. On the right side in the card’s settings menu enter the following command in the field ‘Generate code’:
set workflow follow up count =0
This will generate the following code:
workflow.follow_up_count = 0 // set the follow up count to 0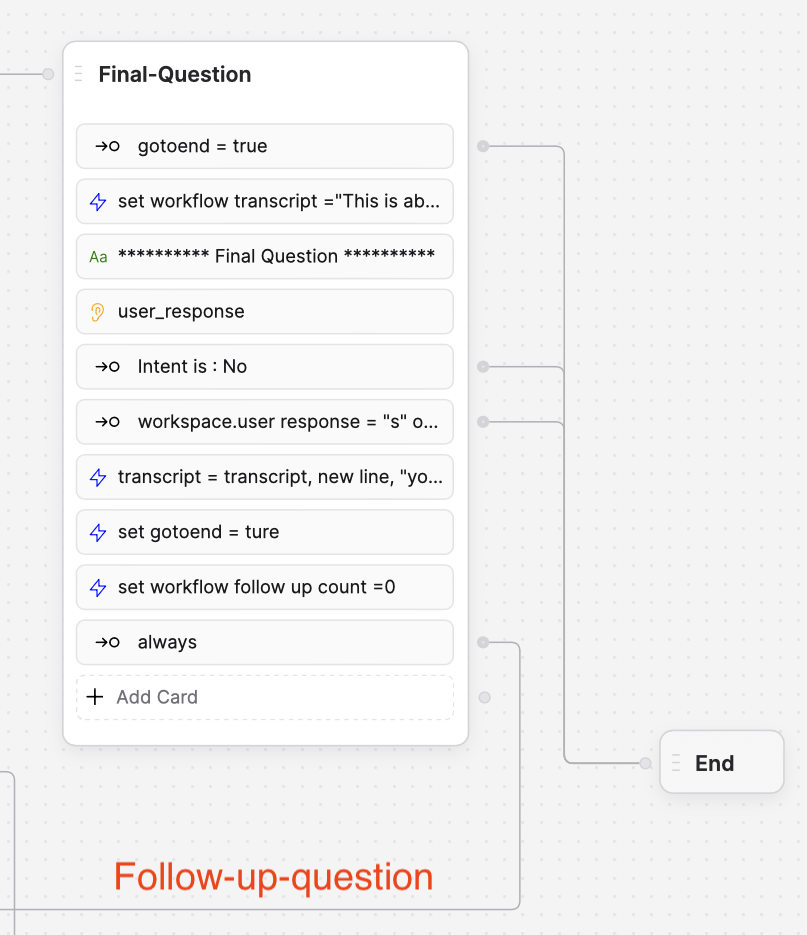
This is how the ‘Final-Question’ node should look now. The last ‘Expression’ card ‘always’ should be now connected to ‘Follow-up-question’ node. All other intentions and expressions are connected to the end node at the moment.
Now after the bot goes through all 3 topics (main questions) it will ask whether the user has something else to add and depending on the answer it either will proceed to the end node or follow up with 2 additional questions on the user proposed topic.
Leave a Reply
You must be logged in to post a comment.