
A template of a recruitment chatbot is available on BotPress website. The aim of this post is to understand how it works.
Creating the chatbot
I went to BotPress Cloud Studio, in my Workspase I clicked ‘Create chatbot’ button, then I chose ‘Start from Template’ and there I chose ‘Basic (empty)’. When choosing a template you will notice ‘Recruitment Bot’ option.
Now I have a ‘start’ node and an ‘end’ node. My plan is to go node by node from the ‘Recruitment Bot’ template to understand how it works and perhaps in the end to add a few of my own modifications to it.
Adding the first node
Right click on the field -> Standard Node. That will add the first node. Let’s rename ‘Standard1’ to ‘Candidate-Details’. Left click and hold at the ‘start’ node, then drag it to the ‘Candidate-Details’ node. Node are now connected.
Editing the node
- From the toolbox select ‘Text’ card and drag it to the node. Click on the newly added card. On the right side in the card’s settings menu enter the following text in the field ‘Message to send’: “Hi there.”. This message will be displayed when the new chat starts.
- From the toolbox select ‘Text’ card and drag it to the node. On the right side in the card’s settings menu enter the following text in the field ‘Message to send’: “This bot helps us gather information from interesting potential candidates. The bot will ask you questions about your story and your work history. It will continue to drill down on questions until you type “s” for “skip”. We are excited to learn as much as possible about you, but please skip as soon as you feel that a question doesn’t add anything further to what you have already answered.”. This message will be displayed when the new chat starts.
- From the toolbox select ‘Person Name’ card and drag it to the node.
On the right side in the card’s settings menu enter the following text in the field ‘Question to ask the user’: “What is your name?”.
Under ‘store results in’ create a variable ‘full_name’.
In the original template the ‘Number of messages from history to extract from’ is set to 1, however, in my case it always extracted a wrong name, so I just left it to be set to 0. - From the toolbox select ‘Email Address’ card and drag it to the node.
On the right side in the card’s settings menu enter the following text in the field ‘Question to ask the user’: “What is your email address?”.
Under ‘store results in’ create a variable ’email’.
Again I left ‘Number of messages from history to extract from’ set to 0. - From the toolbox select ‘Raw Input’ card and drag it to the node.
On the right side in the card’s settings menu enter the following text in the field ‘Question to ask the user’: “What is the position you are applying for in one sentence?”.
Under ‘store results in’ create a variable ‘position’. - From the toolbox select ‘Raw Input’ card and drag it to the node.
On the right side in the card’s settings menu enter the following text in the field ‘Question to ask the user’: “In one sentence please tell us about your experience and capabilities.”.
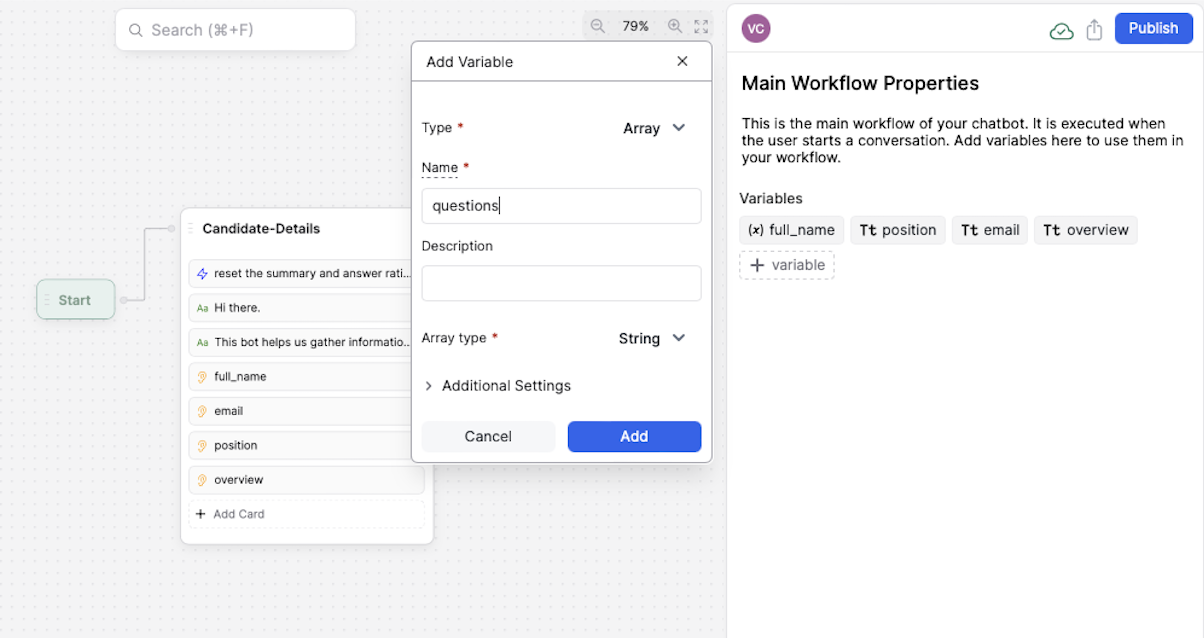
Under ‘store results in’ create a variable ‘overview’. - In the ‘Main Workflow Properties’ click ‘+ variable’. In the variable settings choose ‘Type’: Array, ‘Name’: questions, ‘Array type’: String and click ‘Add’ button.
- From the toolbox select ‘Execute code’ card and drag it to the node. Click on newly added ‘Execute code’ card. On the right side in the card’s settings menu enter the following command in the field ‘Generate code’: “(no temp variables) populate questions with the following questions: Can you tell me about a time when you successfully overcame a significant challenge in your professional life? What skills or experiences do you feel make you the best fit for this role? How do you stay current with industry trends and advancements in your field?”. This should generate code which populates array ‘questions’ with the provided set of questions.
workflow.questions = [ "Can you tell me about a time when you successfully overcame a significant challenge in your professional life?", "What skills or experiences do you feel make you the best fit for this role?", "How do you stay current with industry trends and advancements in your field?" ]; - In the ‘Main Workflow Properties’ click ‘+ variable’. In the variable settings choose ‘Type’: Number, ‘Name’: total_questions, ‘Additional Settings’ -> ‘Default Value’: 10, and click ‘Add’ button.
- From the toolbox select ‘Execute code’ card and drag it to the node. Click on newly added ‘Execute code’ card. On the right side in the card’s settings menu enter the following command in the field ‘Generate code’: “total_questions = ubound of questions (number of questions)”. In my case it generated the followng code:
const totalQuestions = workflow.questions.length;
which is different from the code in the template:workflow.total_questions = workflow.questions.length
I decided to copy and paste the code from the template.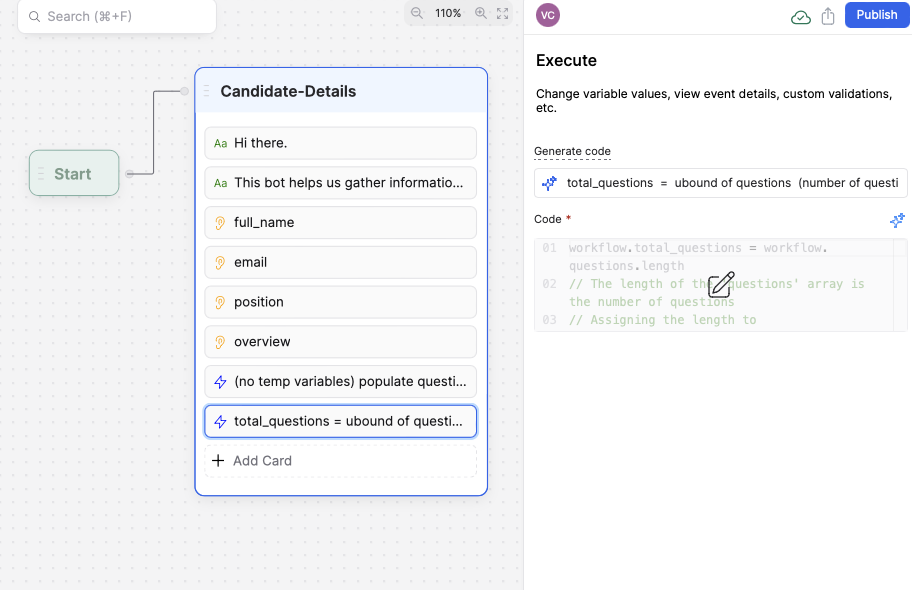
The first node is almost finished. It greets a new user, collects its full name, email address, position title the user is wishing to apply for as well as user’s experince and capabilities. It stores all the data into the designated variables. It also stores any questions we would like to ask the user later into an array.
The next step would be to add ‘Expression’ card to our node which would be used to transition to the next node where user will be asked a set of questions we prepared in the first node.

You can try the chatbot in Emulator window.
Leave a Reply
You must be logged in to post a comment.