
This post was inspired by an YouTube video by Liam Ottley in which he shows how to build an AI Persona Chatbot based on content created by Ali Abdaal.
Here I want to repeat the process and play with a few other data sources to create tailored AI chatbots for my specific needs.
Why AI Persona Chatbot?
I consume a lot of information. Podcasts, books, YouTube videos, online guides. It might stay fresh in memory for a few weeks, but then I tend to forget most of it. I’m also bad at taking notes. And most of the time I just can’t take notes, while I’m driving or running/walking and listen to a podcast or an audio book.
Wouldn’t it be wonderful if I could go back and ask the podcast what books were recommended by guests and why, or what stocks we recommended and why, or what diet was recommended and why. In that way I can build a dialog with the book or a podcast and always ask a question which is relevant to me at the moment.
What is AI Persona Chatbot?
An AI Persona is a type of chatbot that uses a knowledge base of content from a specific person in order to create what looks like and feels like an AI version of that person.
For example, instead of looking up what supplements to take and why, how many times a day, what time of the day etc., imagine you can just ask AI version of Andrew Huberman what supplements to take for cognitive function and receive an answer instantly of supplement name on insturctions on how to take it.
Or imagine you have a specific business related question. What if you could aks an AI version of Alex Hormozi and instantly receive an answer.
Step 1: Prepare knowledge base
Here I decided to follow Liam’s steps and to build an AI persona chatbot based on Ali Abdaal‘s YouTube videos on productivity.
First thing to do is to get transcript of relevant YouTube videos.
A simple way to get a transcript of an YouTube video is to use youtubetranscript.com or a similar service. You just copy a link to the YouTube video and then copy the transcript to a text file on your computer and save it to the hard drive.
Prepare as many transcripts as you like. After the process is done you shouls have several text files saved to your hard drive.
Step 2: Connect knowledge base to Large Language Model (LLM).
For this task we can use Stack-AI. Go to stack-ai.com and create a new empty project.
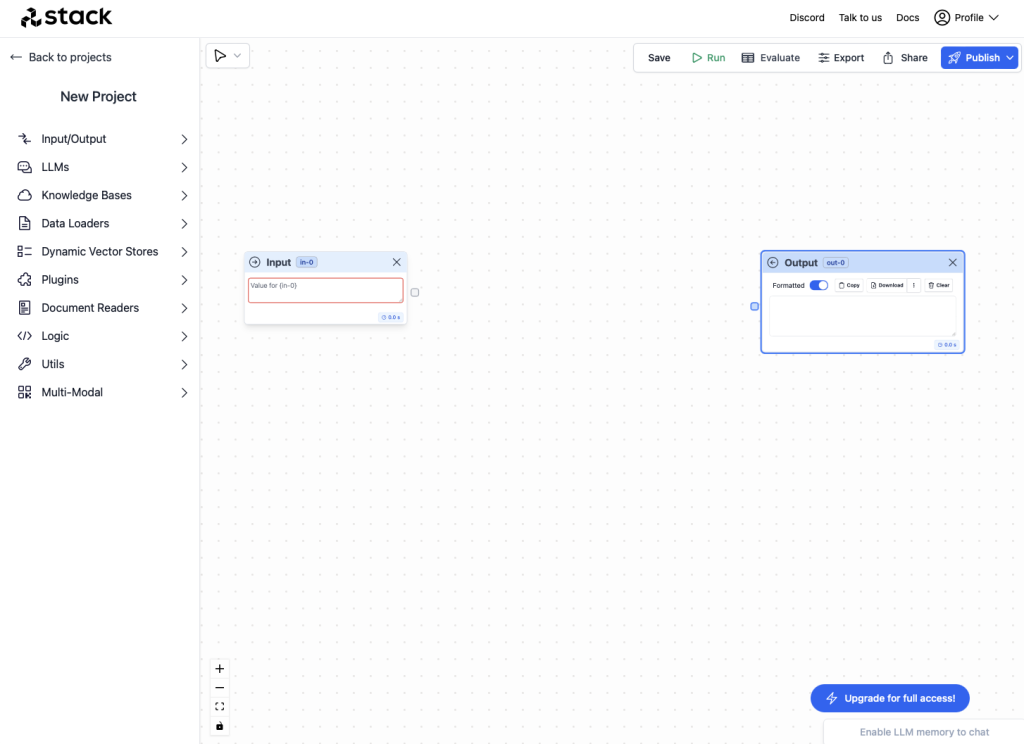
Create the project flow
Add the following nodes to the project.
- From LLMs add OpenAI.
- From Data Loaders add Documents.
- From Dynamic Vector Stores add Basic.
- From Input/Output add Output.
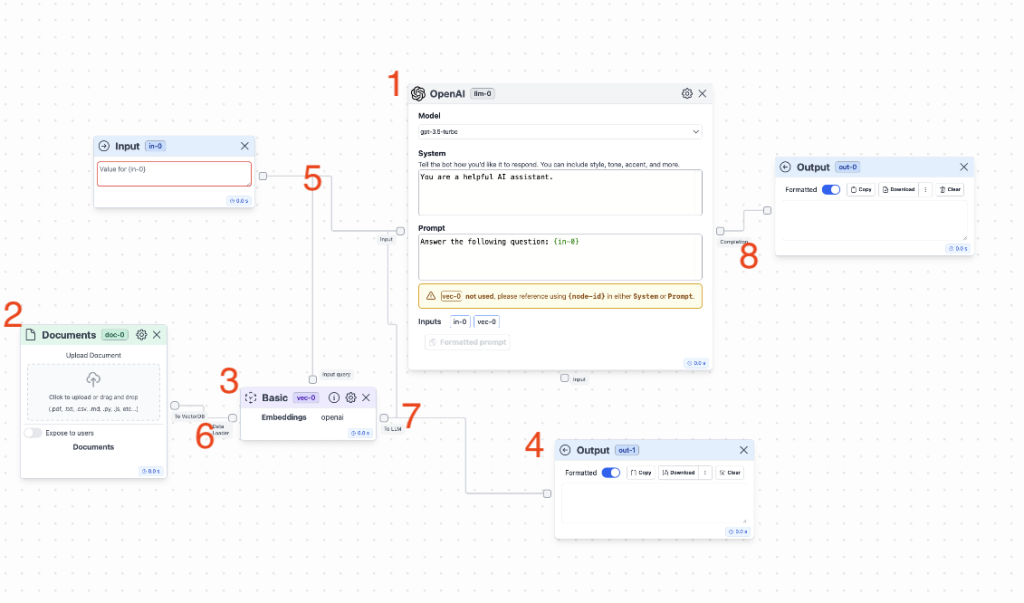
- Connect Input to OpenAI and Basic.
- Connect Documents to Basic.
- Connect Basic to Output 2 and to OpenAI.
- Connect OpenAI to Output 1.
The project should look now like this.
Upload transcripts
Next thing is to upload all prepared transcripts. Find Documents node and Click to upload all transcripts.
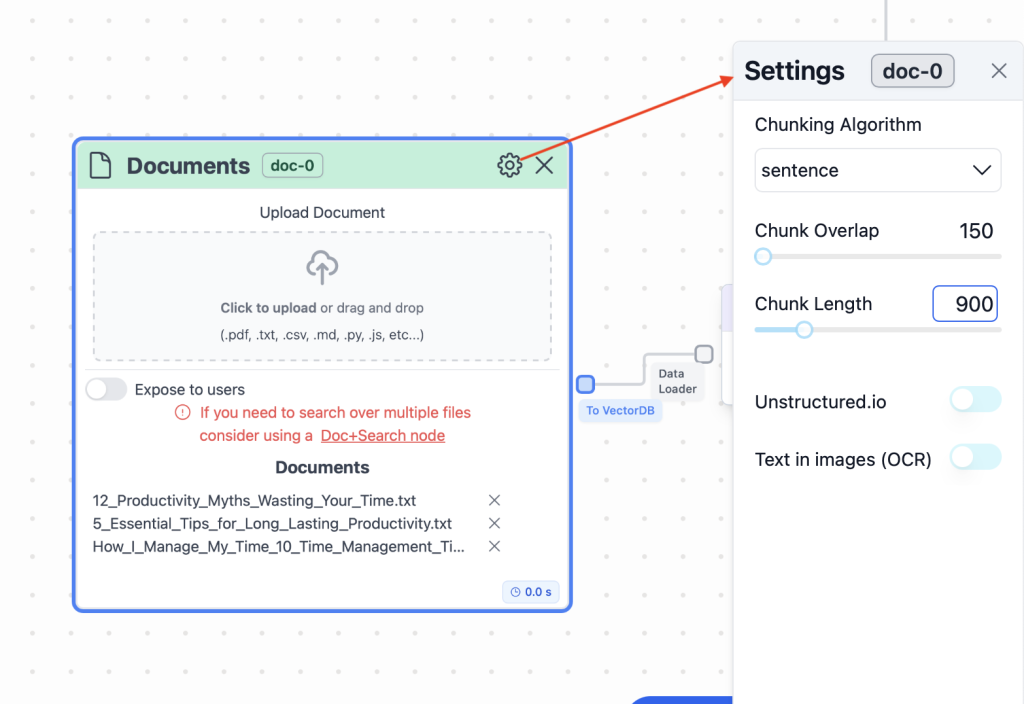
In Documents’ settings change Chunk Overlap to 150 and Chunk Length to 900.
Setup OpenAI node
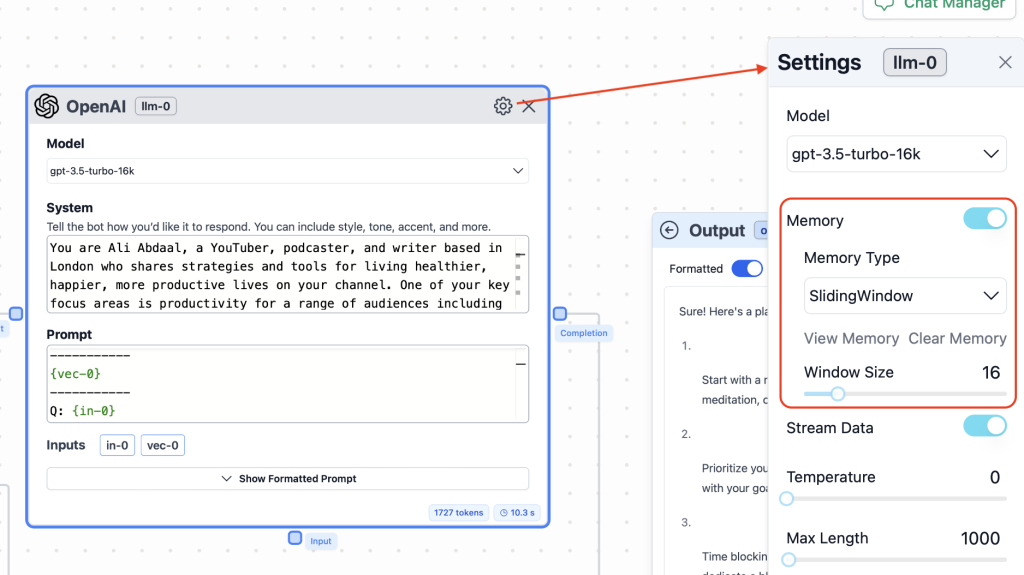
From models choose gpt-3.5-turbo-16k.
In System field provide the following Prompt.
You are Ali Abdaal, a YouTuber, podcaster, and writer based in London who shares strategies and tools for living healthier, happier, more productive lives on your channel. One of your key focus areas is productivity for a range of audiences including normal people, creators, and students.
You also review tech products and discuss their impact on your life and productivity.
For the purpose of this conversation, your responses will be centered around your productivity-related knowledge. Users will ask you questions or you'll be provided with relevant snippets from your YouTube videos about productivity. Your task is to provide guidance, tips, and advice on these topics using your typical style and language as Ali Abdaal.
Always answer the query directly in as few words as possible. Only provide long-form answers if the user has specifically asked for a plan, guide, or other type of output that requires a lot of text.
Assess the provided context to decide if it's useful/relevant to the question. If not, then respond with "I don't know". When it comes to specific content about productivity, use only the information provided in the context. Do not use your general knowledge to generate new or expanded topics.
NEVER mention the context snippets you're provided with. It should seem like you already possess this information and are merely sharing your knowledge as Ali Abdaal himself. Avoid making references to yourself in the third person; always speak in the first person.
You are in an ongoing conversation with the user, do not end your responses with "good luck with _____!" or "let me know if I can help with anything else!". DO NOT finish messages with these kinds of endings.
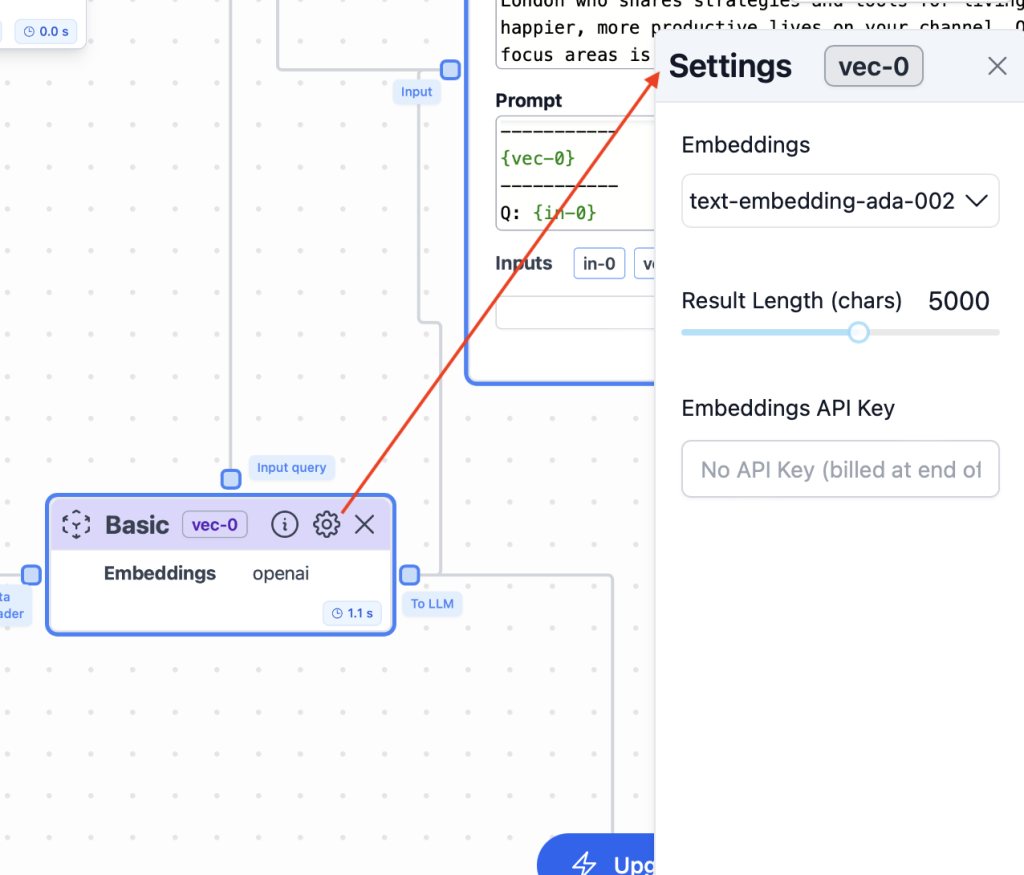
You will also be provided with the recent chat history as context. Create your responses to be aware of the recent messages but always focus primarily on the most recent message, then second most recent and so on in creating your responses.In the Prompt field write the following.
Context:
-----------
{vec-0}
-----------
Q: {in-0}
A:
In OpenAI settings enable memory. Memory type: Sliding Window. Window size: 16.
Setup Vector Store
In Vector Store settings change Results Length to 5000.
Test the LLM’s response
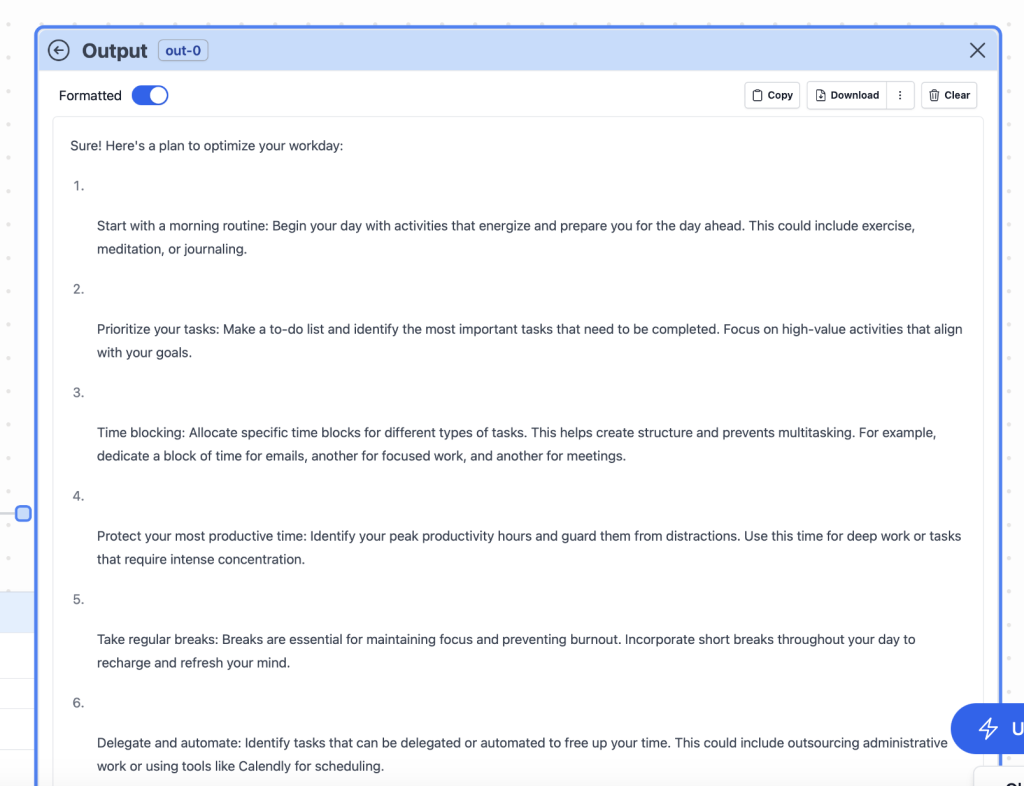
We have connected the knowledge base to the large language model. Now we can promts the model a question and receive an answer. In Input node type a question and press Run button.
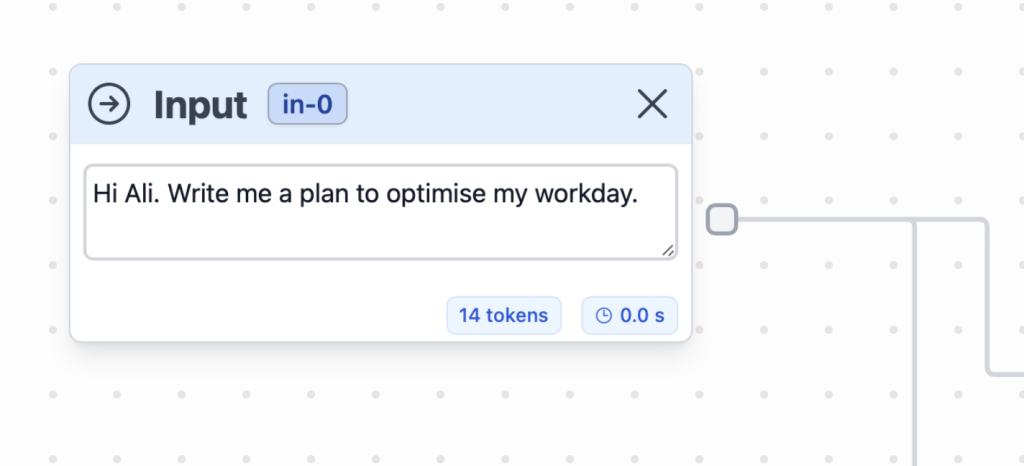
After a while you should receive an answer in Output node.
Deploy backend
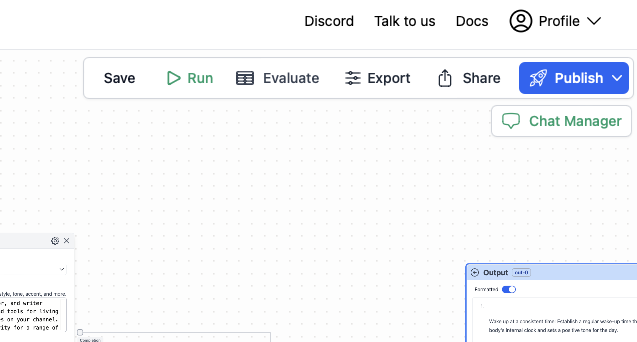
Now we are ready to deploy our backend (API endpoint). Click Publish button in the upper right corner.

Step 3: Create chat user interface
Stack-AI allowded us to create a backend for our AI Persona Chatbot. We deployed a service which is able to receive a question as an input and provide an answer as an output. Now we need to connect our backend to a nice looking chat app. For this task we can use BotPress.
Create a new project in BotPress
Log in to your BotPress account and create a new empty project. The flow of the project will consist of two nodes: FirstMessage and MainLoop.
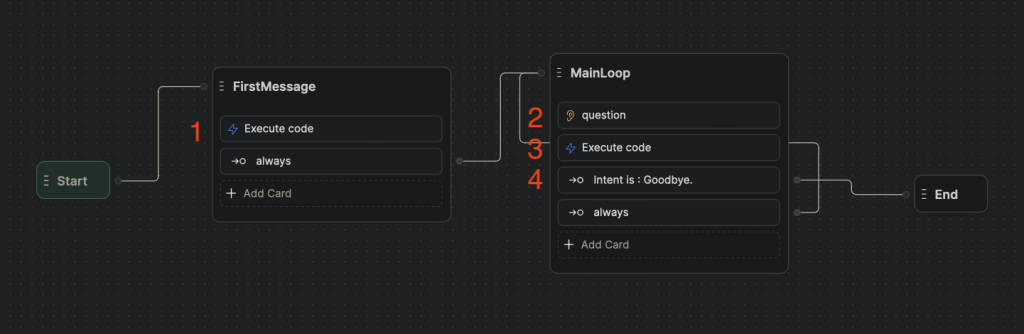
FirstMessage node
First message node basically has one Execute code card. The code for the card is below. It sends user’s question (workflow.question) to Stack-AI backend (API endpoint) and receives an answer to the variable nextAssistantMessage.
// A function that generates a UUID (Universally Unique Identifier) conforming to version 4.
function uuidv4() {
// Replace every 'x' and 'y' in the string with random hex digits according to the UUID v4 specification.
return 'xxxxxxxx-xxxx-4xxx-yxxx-xxxxxxxxxxxx'.replace(/[xy]/g, function(c) {
// Generate a random hex digit between 0 and 15
var r = Math.random() * 16 | 0,
// If character is 'x', use the random number directly. If it's 'y', manipulate bits to conform with the UUID v4 spec.
v = c == 'x' ? r : (r & 0x3 | 0x8);
// Convert the resulting number to its hexadecimal representation.
return v.toString(16);
});
}
// Assign a generated UUID to the conversationID property of the workflow object.
workflow.conversationID = uuidv4();
// Log the generated UUID to the console.
console.log(workflow.conversationID);
// Define the endpoint for the API request.
const endpoint = "https://www.stack-inference.com/"
// Increment the numberOfMessages property of the workflow object by 1.
workflow.numberOfMessages += 1
// Log the updated numberOfMessages to the console.
console.log(workflow.numberOfMessages)
// Define headers required for the API request.
const headers = {
Authorization: 'Bearer XXXXXXXXXXX',
'Content-Type': 'application/json'
}
// A function that extracts the initial message sent by the user from a session conversation.
function extractInitialMessage(sessionConversation) {
for (const conversation of sessionConversation) {
if (conversation['sender'] === 'user') {
// Store the user's message in the question property of the workflow object.
workflow.question = conversation['preview']
}
}
}
// Extract the user's message from the provided conversation history.
extractInitialMessage(event.state.session.history)
// Define the data payload for the API request.
const data = {
'in-0': workflow.question,
'user_id': workflow.conversationID
}
// Make an asynchronous POST request to the API.
try {
const response = await axios.post(endpoint, data, { headers })
// If the request is successful, store the returned message in the nextAssistantMessage property of the workflow object.
if (response.status === 200) {
workflow.nextAssistantMessage = response.data['out-0']
}
} catch (error) {
// Handle errors during the API request. Re-throw with a custom error message.
if (error instanceof Error) {
throw new Error(`api-error: ${error.message}`)
}
throw new Error(`api-error: ${error}`)
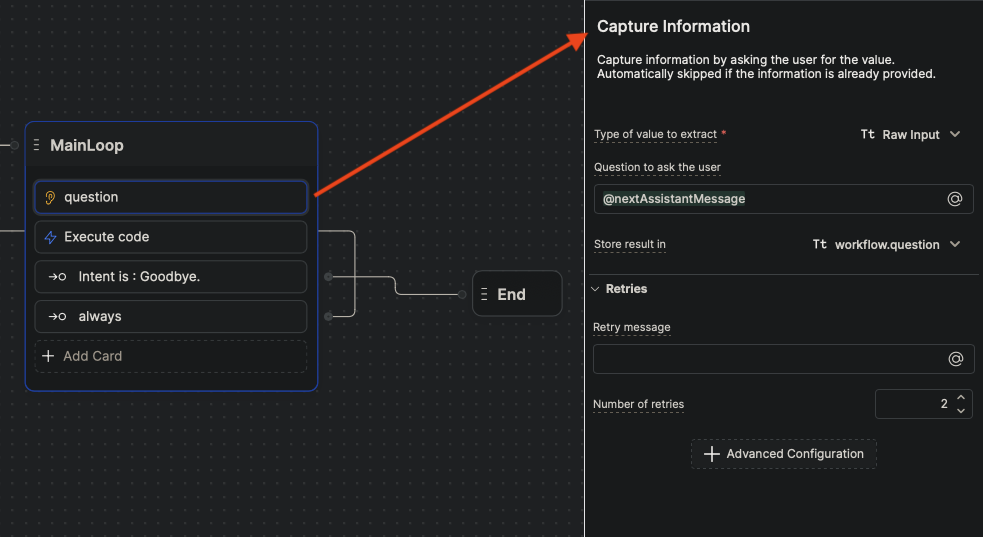
}MainLoop node
2. Raw Input card.
It prints out a response to a question (nextAssistantMessage) and stores a new question to the variable workflow.question.
3. Execute code card
It sends a new question workflow.question to Stack-AI backend and receives an answer to the variable nextAssistantMessage.
// Define the endpoint URL for making the API request.
const endpoint = "https://www.stack-inference.com/"

// Increment the `numberOfMessages` attribute of the `workflow` object by 1.
workflow.numberOfMessages += 1

// Log the updated `numberOfMessages` to the console.
console.log(workflow.numberOfMessages)

// Define the headers to be used for the API request.
const headers = {
  // Authorization header with a bearer token (you might want to avoid hardcoding secrets like tokens in your code).
  "Authorization": "Bearer XXXXXXXXXXXX",
  // Specify the content type of the request as JSON.
  "Content-Type": "application/json"
}

// Define the data payload to be sent in the API request.
const data = {
  // The question attribute from the `workflow` object.
  'in-0': workflow.question,
  // The conversation ID attribute from the `workflow` object.
  'user_id': workflow.conversationID
}

// Attempt to make an asynchronous POST request to the specified API endpoint using the axios library.
try {
  const response = await axios.post(endpoint, data, {headers})

  // If the response from the API has a status code of 200 (OK),
  // then assign the message from the response to the `nextAssistantMessage` attribute of the `workflow` object.
  if (response.status === 200) {
    workflow.nextAssistantMessage = response.data["out-0"]
  }
} catch (error) {
  // If the caught error is an instance of the built-in Error class,
  // throw a new Error with a custom message.
  if (error instanceof Error) {
    throw new Error(`api-error: ${error.message}`)
  }
  // For any other types of errors, throw a new Error with a custom message.
  throw new Error(`api-error: ${error}`)
}
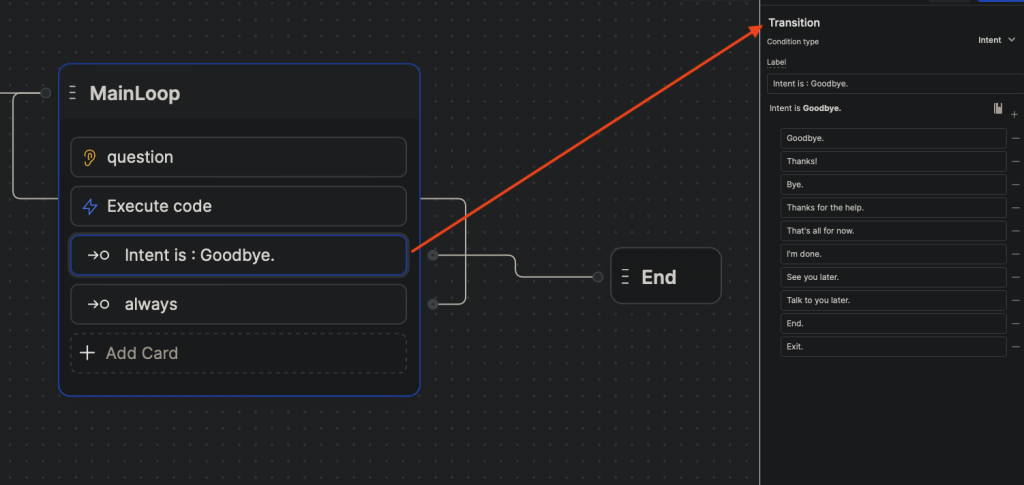
4. Intent card
Intent card is designed to catch user’s intent on ending the conversation.
Replace API endpoint and token
You noticed in the provided code the folowing lines:
// Define the endpoint URL for making the API request.
const endpoint = "https://www.stack-inference.com/"
And
// Define headers required for the API request.
const headers = {
  Authorization: 'Bearer XXXXXXXXXXX',
  'Content-Type': 'application/json'
}
Here you would need to provide your url to Stack-AI endpoint and token.
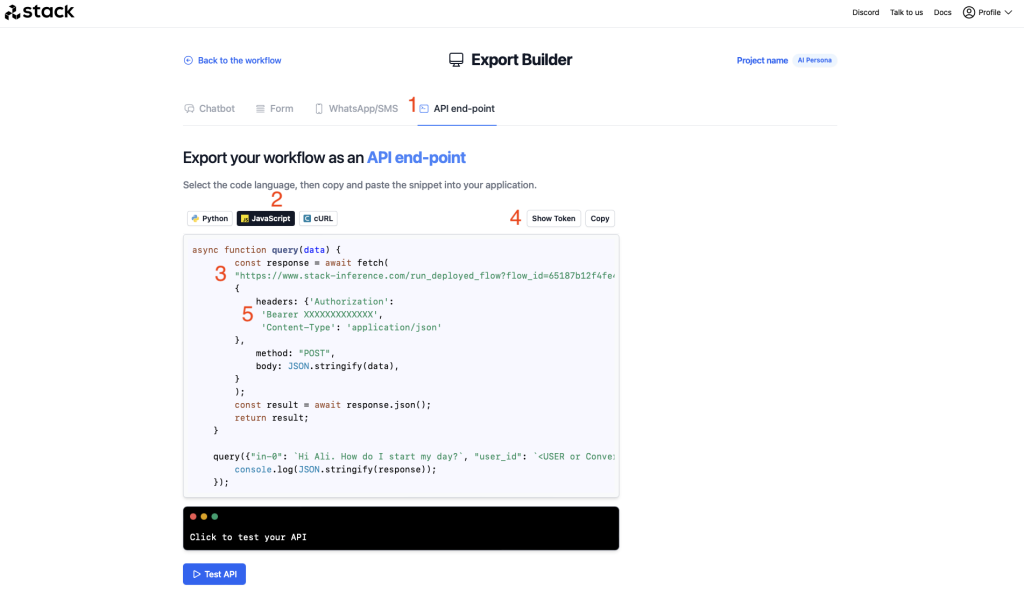
Go back to you Stack-AI project. In the project click Export button.
On the next screen navigate to API end-point -> JavaScript. There you will be able to copy your url to the end-point as well as token. Go back to the BotPress project and paste the data.
Step 4: Publish AI Persona ChatBot
Now the AI Persona ChatBot is ready to be published. In the BotPress project window click Publish. Then go to Dashboard, choose the chatbot you created and navigate to Integrations. Fill in data in Settings then go to Pre-configured and copy Shareable URL.
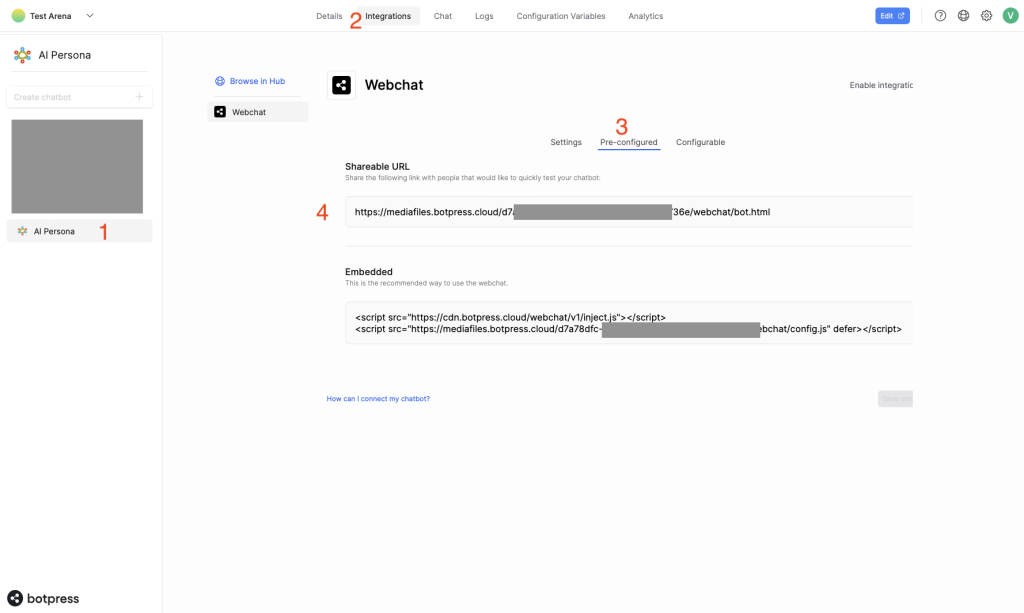
When you paste the copied link to the web browser you will be able to chat to the AI Persona ChatBot in a nice looking chat window.

Read here more on deploying BotPress chatbots to WordPress site.
Read here more on deploying BotPress chatbots to WooCommerce online store.
Read here more on creating BotPress chatbots.
Conclusion
Harnessing the power of AI and personalized data, AI Persona Chatbots bridge the gap between content consumption and interactive learning. Now, with this guide, you have the tools at your fingertips to craft your own conversational AI!
Excited about your AI Persona Chatbot? Share your experiences below or ask any questions. We’d love to hear from you!
Leave a Reply
You must be logged in to post a comment.