
In the era of digital interaction, chatbots have become an essential tool for enhancing user engagement on websites. If you’re using WordPress and looking to leverage this technology, you’re in luck! Our latest blog post guides you through the process of integrating a BotPress chatbot into your WordPress site. BotPress, known for its versatility and ease of use, can significantly improve your site’s interactivity and user support.
Additionally, if you are looking to integrate a BotPress chatbot into your WooCommerce online store, you may find our post titled ‘How to add a BotPress chatbot to your WooCommerce online store‘ particularly interesting.
This guide is tailored for those who already have a working chatbot on their BotPress account and are looking to seamlessly integrate it into their WordPress environment. Whether you’re aiming to engage visitors across your entire site or focus on specific posts or pages, we’ve got you covered with clear, step-by-step instructions.
By the end of this post, you’ll have a fully operational BotPress chatbot on your WordPress site, ready to interact with your visitors and enhance their experience. So let’s dive in and unlock the potential of chatbot technology for your website!
Preparation: copy code from BotPress
First, let’s assume you have a working chatbot published in BotPress cloud studio.
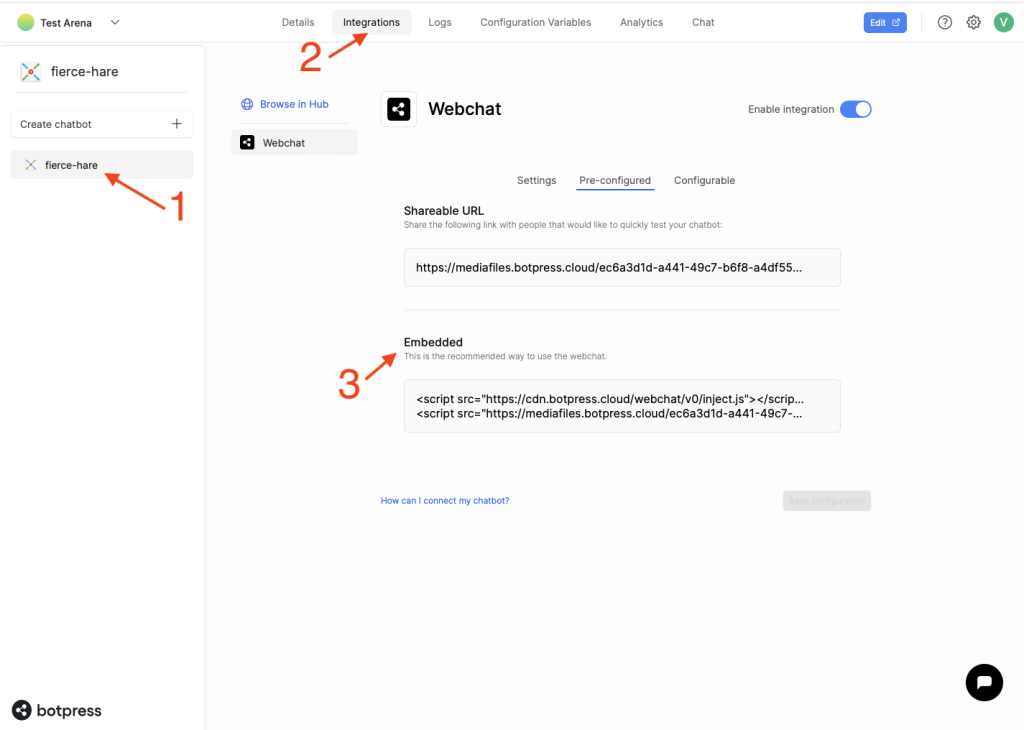
- From the list of your chatbots select the one you would like to add to your WordPress site.
- Click Integrations button in the upper menu.
- In the Embedded field select and copy lines of code which were generated by BotPress.
Add the code snippet to your WordPress site
There are several ways to do this.
Method 1: Use WordPress functions and hooks
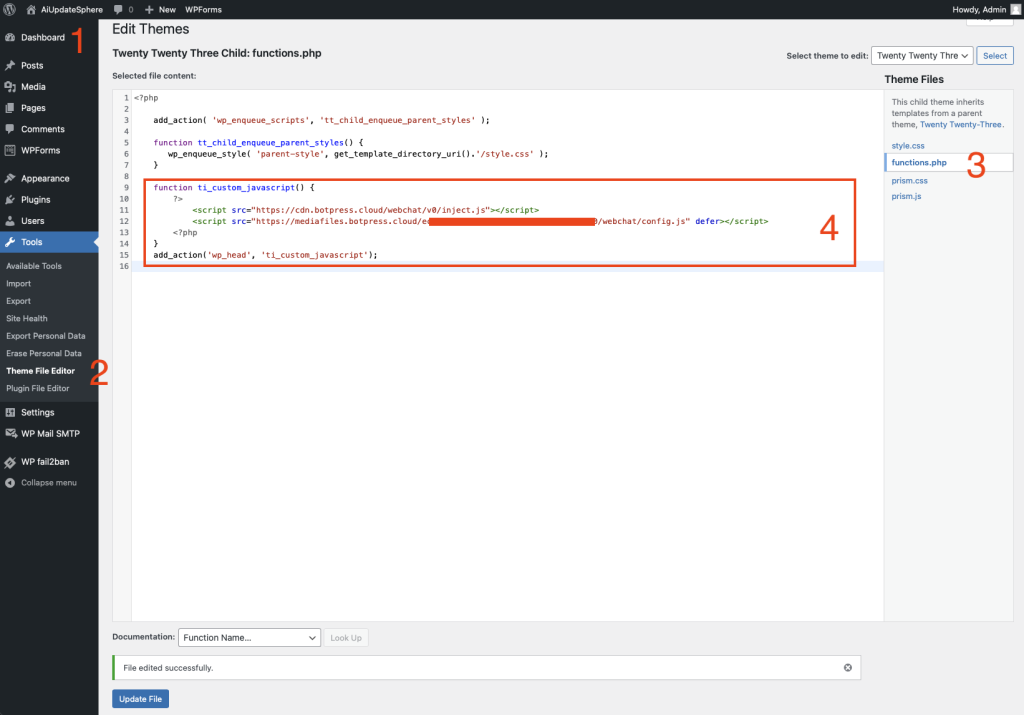
To add custom JavaScript to your WordPress site using functions and hooks, you’ll need to insert your code into your child theme’s functions.php file.
- Head to your WordPress site Dashboard.
- Under Tools choose Theme File Editor.
- Then choose functions.php from the list of available files.
It is recommended to do a backup before duing any modifications to functions.php file.
Next, depending on whether you would like the chatbot to be available throughout the whole site or just on a single post/page you would need to use a corresponding examle from below.
Depending on your case copy one of the examples from below to the functions.php file and then replace line ‘// Copy your BotPress here.’ with a code you copied from BotPress site.
Add BotPress to the entire WordPress site
function ti_custom_javascript() {
    	?>
        	// Copy your BotPress code here.
    	<?php
	}
	add_action('wp_head', 'ti_custom_javascript');
Add BotPress to a specific post
Here you would need to replace number 38 in is_single (’38’) to one specific to your post. You can find it in post’s URL.

function ti_custom_javascript() {
	if (is_single ('38')) {
    	?>
        	// Copy your BotPress code here.
    	<?php
  	}
}
add_action('wp_head', 'ti_custom_javascript');
Add BotPress to a specific page
Here you would need to replace number 2 in is_page (‘2’) to one specific to your post. You can find it in post’s URL.

function ti_custom_javascript() {
	if (is_page ('2')) {
    	?>
        	// Copy your BotPress code here.
    	<?php
  	}
}
add_action('wp_head', 'ti_custom_javascript');
Method 2: Use a plugin
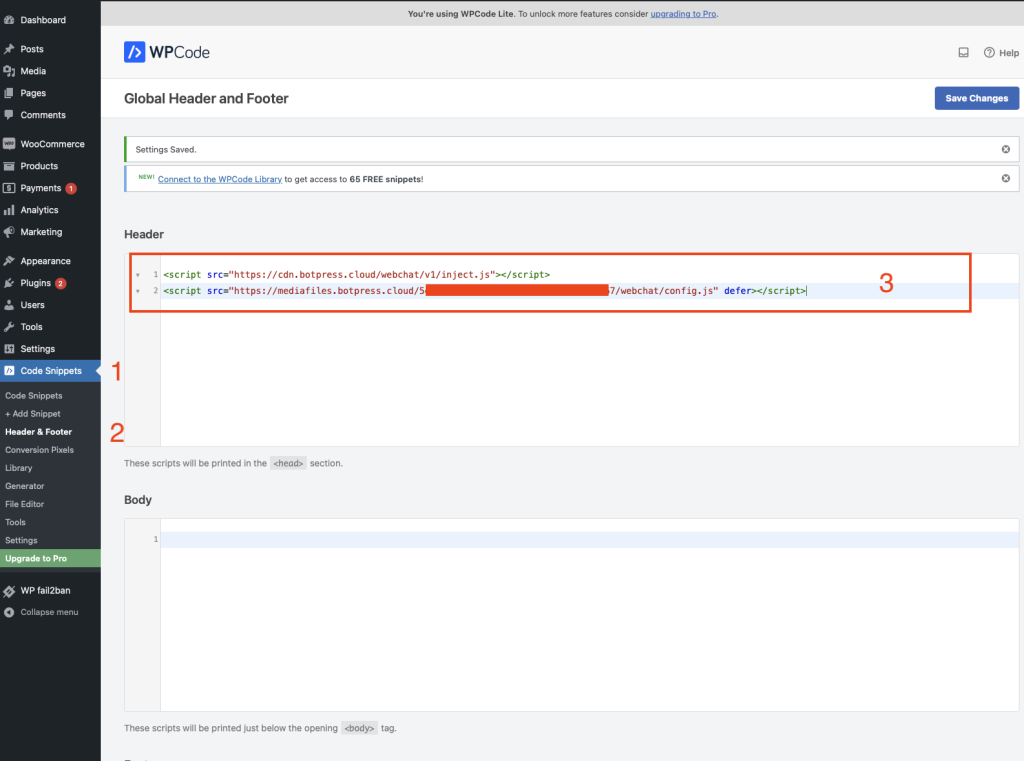
Alternatively, the easiest way to add JavaScript to WooCommerce is by using a plugin. There are many plugins available. For example, WPCode – Insert Headers and Footers.
Once the pluging is installed and activete, navigate to Code Snippets -> Header & Footer.
In the Header field paste the code you copied from BotPress cloud studio. Save changes.
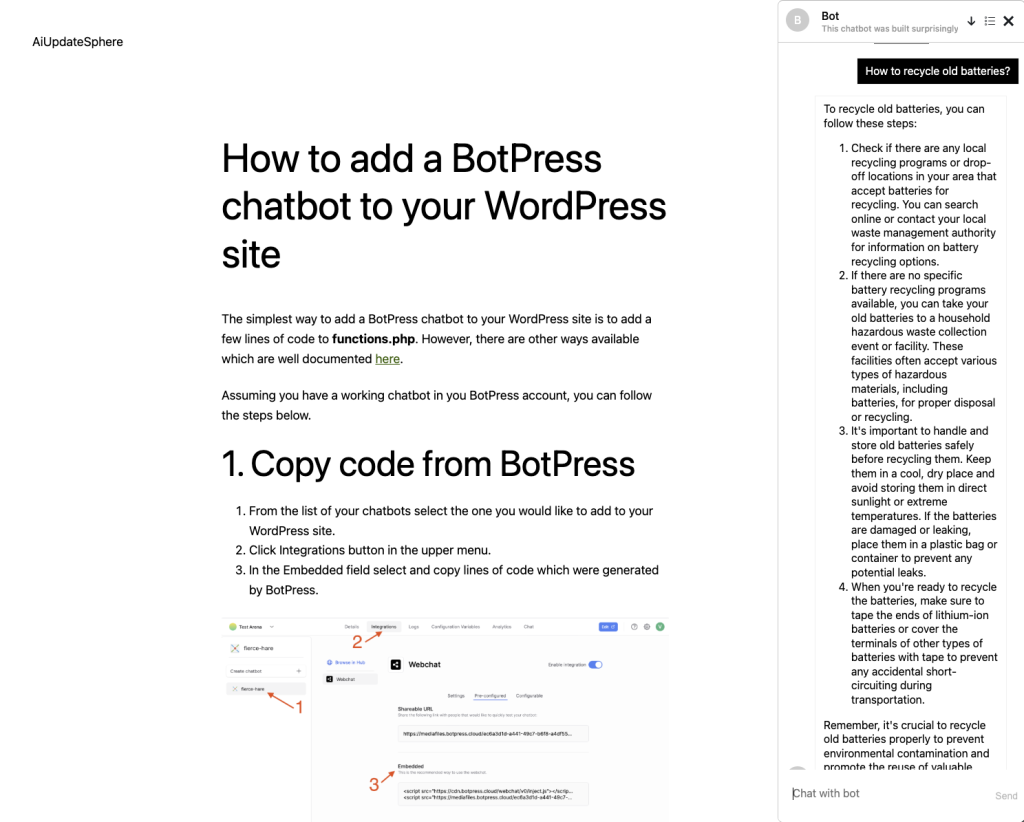
Testing the Chatbot
Congratulations! Now you should have a functioning BotPress chatbot available on your WordPress site.
Conclusion
As we wrap up this comprehensive guide on integrating a BotPress chatbot into your WordPress website, it’s important to reflect on the value this technology brings. Chatbots are no longer just a trend; they are a pivotal part of enhancing user experience, providing instant support, and engaging visitors in meaningful ways. By following the steps outlined in this post, you’ve taken a significant step in modernizing your website and staying ahead in the digital landscape.
Whether you chose to embed the BotPress chatbot across your entire site or targeted specific posts or pages, the flexibility and customization offered by this integration ensure that your website remains dynamic and user-friendly. Remember, the journey doesn’t end with implementation. Regularly test and update your chatbot to align with your evolving content and audience needs.
We encourage you to explore the full potential of your new chatbot. Monitor its interactions, gather feedback, and continuously refine its performance to better serve your audience. The integration of a BotPress chatbot on your WordPress site is not just about adopting new technology; it’s about creating a more interactive, responsive, and engaging online presence.
In an era where digital communication is key, your BotPress chatbot is now an invaluable asset to your WordPress site. Embrace this journey, and watch as your site transforms into a more interactive and user-focused platform.
Leave a Reply
You must be logged in to post a comment.