
Introduction
Welcome to this online tutorial, where we explore the exciting world of integrating custom GPTs (Generative Pre-trained Transformers) into any website. This tutorial is designed for those who have developed GPTs using the Builder and are now ready to implement them in real-world applications, beyond the confines of the ChatGPT site.
We will dive deep into the process of embedding your GPTs onto websites, providing a comprehensive understanding of how OpenAI has paved the way for integrating GPTs into various aspects of our digital lives. This opportunity is ripe for exploration, and this tutorial aims to position you at the forefront of this technological advancement.
This tutorial follows YouTube tutorial by Liam Ottley.
My GPTs vs Assistant API
It’s important to begin with an essential distinction between GPTs built on the ChatGPT website and those developed using OpenAI’s Assistant API. The former are often seen as ‘consumer toys’—intriguing, yet limited in scope. They offer a basic user interface for creating and showcasing GPTs but lack the capability for programmatic operation. In contrast, the Assistant API opens up a more robust and business-oriented avenue, allowing for the programmatic creation and operation of advanced GPTs.
This tutorial will guide you through creating an assistant using the Assistant API, a process streamlined for ease, without the need for extensive coding knowledge. You’ll learn how to imbue your assistant with knowledge and functionality, and then integrate it into a website through a chat widget interface. This approach not only enhances user engagement but also leverages the full potential of GPTs in real-world applications.
Overview
In this tutorial, we focus on constructing a custom knowledge chatbot, specifically designed as a sales rep training assistant. It will contain tailored training material for businesses, assisting sales reps in acquiring vital information about products, pricing, and sales techniques.
The tutorial comprises two main components:
- Developing a Replit to manage conversations with the Assistant.
- Linking this system to a frontend platform, Voiceflow.
The Replit setup involves preparing a knowledge base and establishing API endpoints for effective conversation management. You’ll learn how to create an Assistant, save its unique ID for subsequent uses, and thereby minimize API-related expenses.
After establishing the backend, we move to configuring the chatbot frontend in Voiceflow. Once operational in Voiceflow, we’ll demonstrate how to incorporate it into a website. This step entails embedding specific code into your website’s script section to create an interactive chat bubble widget.
Replit setup (backend)
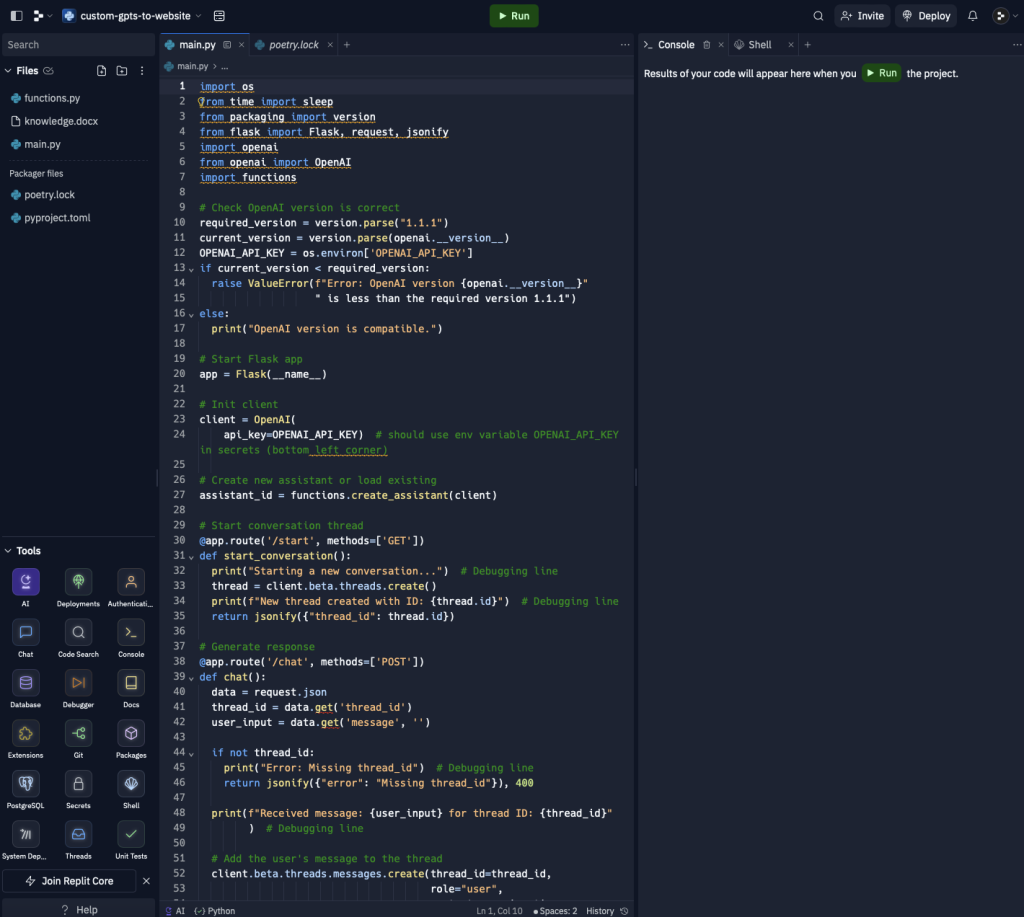
The backend setup in this guide involves three key files: main.py, functions.py, and knowledge.docx. The code, inspired by Liam Ottley’s work, involves starting a Flask app, initializing an OpenAI client, and creating or loading an assistant. The guide discusses how to start conversation threads and generate responses using API calls.
Main.py
import os
from time import sleep
from packaging import version
from flask import Flask, request, jsonify
import openai
from openai import OpenAI
import functions

# Check OpenAI version is correct
required_version = version.parse("1.1.1")
current_version = version.parse(openai.__version__)
OPENAI_API_KEY = os.environ['OPENAI_API_KEY']
if current_version < required_version:
  raise ValueError(f"Error: OpenAI version {openai.__version__}"
                   " is less than the required version 1.1.1")
else:
  print("OpenAI version is compatible.")

# Start Flask app
app = Flask(__name__)

# Init client
client = OpenAI(
    api_key=OPENAI_API_KEY)  # should use env variable OPENAI_API_KEY in secrets (bottom left corner)

# Create new assistant or load existing
assistant_id = functions.create_assistant(client)

# Start conversation thread
@app.route('/start', methods=['GET'])
def start_conversation():
  print("Starting a new conversation...")  # Debugging line
  thread = client.beta.threads.create()
  print(f"New thread created with ID: {thread.id}")  # Debugging line
  return jsonify({"thread_id": thread.id})

# Generate response
@app.route('/chat', methods=['POST'])
def chat():
  data = request.json
  thread_id = data.get('thread_id')
  user_input = data.get('message', '')

  if not thread_id:
    print("Error: Missing thread_id")  # Debugging line
    return jsonify({"error": "Missing thread_id"}), 400

  print(f"Received message: {user_input} for thread ID: {thread_id}"
        )  # Debugging line

  # Add the user's message to the thread
  client.beta.threads.messages.create(thread_id=thread_id,
                                      role="user",
                                      content=user_input)

  # Run the Assistant
  run = client.beta.threads.runs.create(thread_id=thread_id,
                                        assistant_id=assistant_id)

  # Check if the Run requires action (function call)
  while True:
    run_status = client.beta.threads.runs.retrieve(thread_id=thread_id,
                                                   run_id=run.id)
    print(f"Run status: {run_status.status}")
    if run_status.status == 'completed':
      break
    sleep(1)  # Wait for a second before checking again

  # Retrieve and return the latest message from the assistant
  messages = client.beta.threads.messages.list(thread_id=thread_id)
  response = messages.data[0].content[0].text.value

  print(f"Assistant response: {response}")  # Debugging line
  return jsonify({"response": response})

# Run server
if __name__ == '__main__':
  app.run(host='0.0.0.0', port=8080)
Functions.py
import json
import os

def create_assistant(client):
  assistant_file_path = 'assistant.json'

  if os.path.exists(assistant_file_path):
    with open(assistant_file_path, 'r') as file:
      assistant_data = json.load(file)
      assistant_id = assistant_data['assistant_id']
      print("Loaded existing assistant ID.")
  else:
    file = client.files.create(file=open("knowledge.docx", "rb"),
                               purpose='assistants')

    assistant = client.beta.assistants.create(instructions="""
          The assistant, RayHarvest Solar Sales Assistan, has been programmed to help junior sales reps with learning company standard operating procedures and selling techniques as a salesperson.
          A document has been provided with information on RayHarvest Solar’s sales processes and training info.
          """,
                                              model="gpt-4-1106-preview",
                                              tools=[{
                                                  "type": "retrieval"
                                              }],
                                              file_ids=[file.id])

    with open(assistant_file_path, 'w') as file:
      json.dump({'assistant_id': assistant.id}, file)
      print("Created a new assistant and saved the ID.")

    assistant_id = assistant.id

  return assistant_id
Knowledge.docx
The document contains information on RayHarvest Solar’s sales processes and training info.
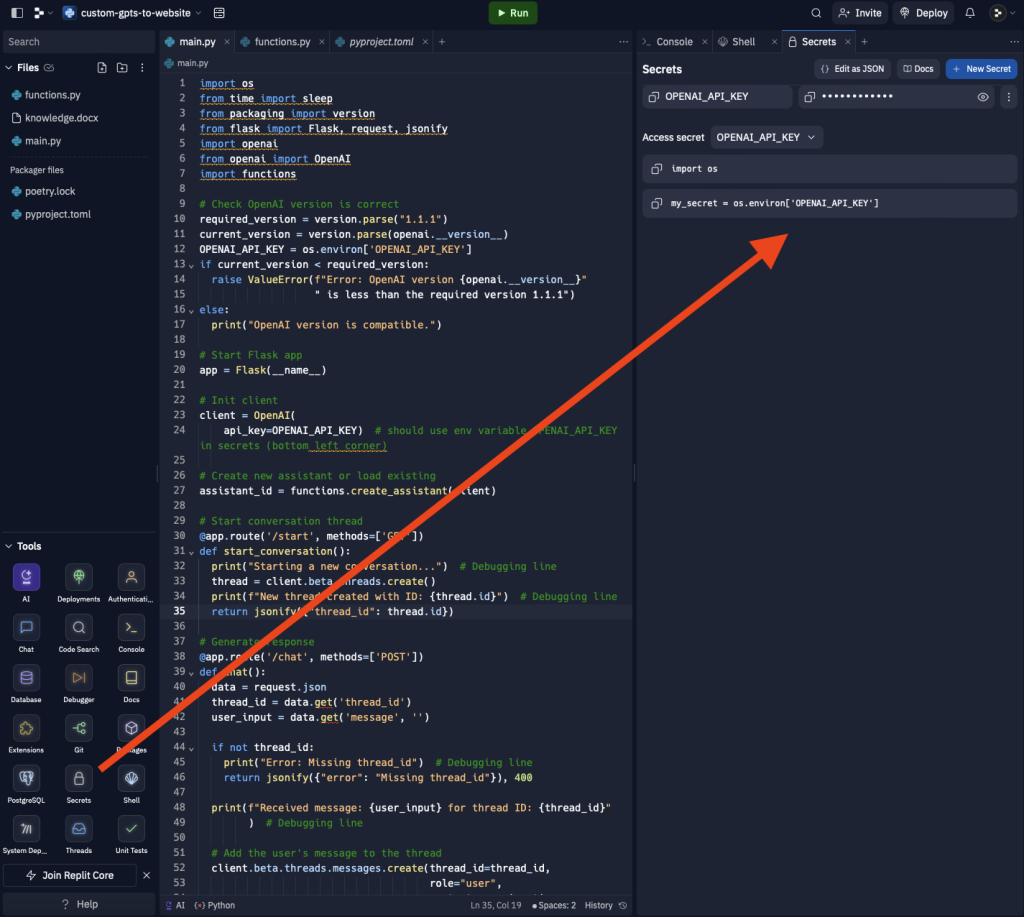
OpenAI API Key
You should add OpenAI API key by going to Secrets and adding a New Secret.
Run Repl
When you click Run the app will start. It will create a new assitant and store assitant ID to assistant.json file. The backend is ready.
Click new tab. Copy URL address. You will need it later.
Voiceflow setup (frontend)
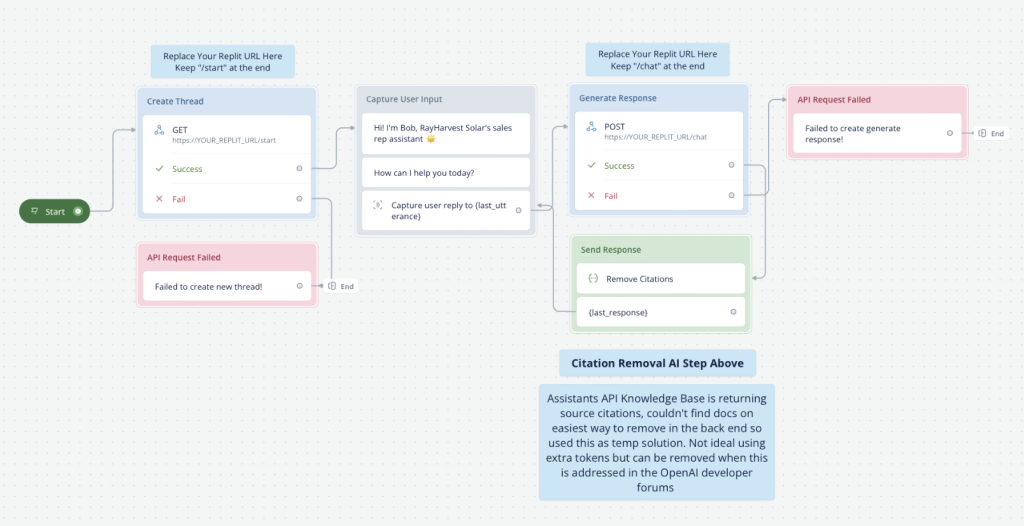
In the frontend setup, the tutorial walks you through configuring Voiceflow to manage user interactions. This includes API call setups for starting conversations, capturing user input, and generating responses. Special focus is given to formatting the assistant’s responses for clarity. The credit for the Voceflow template below goes to Liam Ottley.
Create Thread
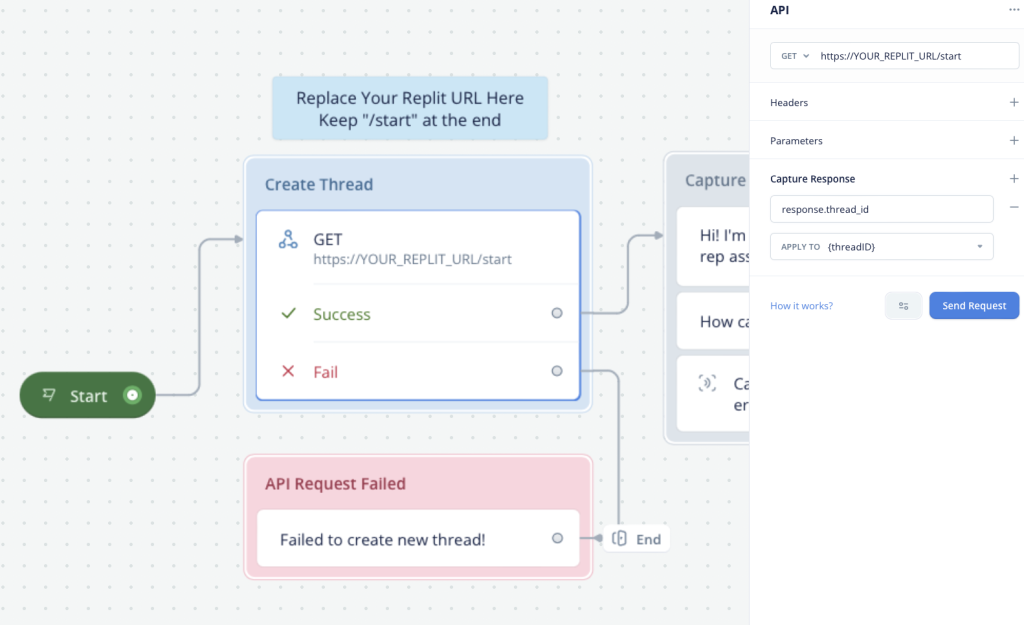
Here you should replace https://YOUR_REPLIT_URL by the link you copied after running Repl. Don’t forget to add /start in the end.
If API call is successful chat flow proceeds to ‘Capture User Input’ otherwise it raises an error.
Capture User Input
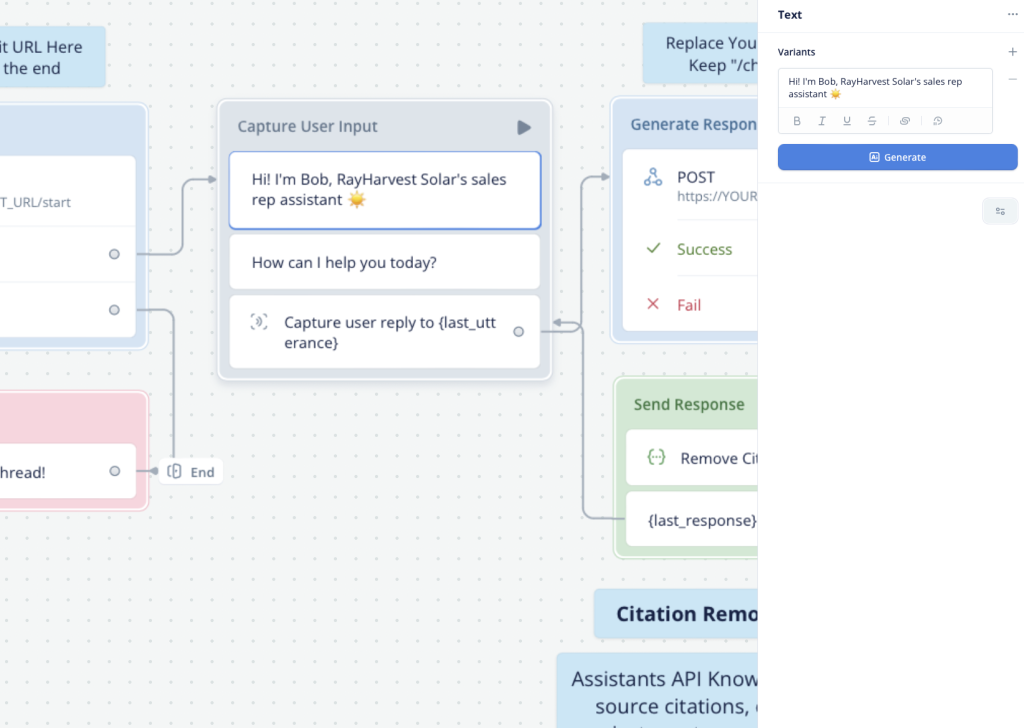
Here you can edit how chat bot greets a user.
Generate Response
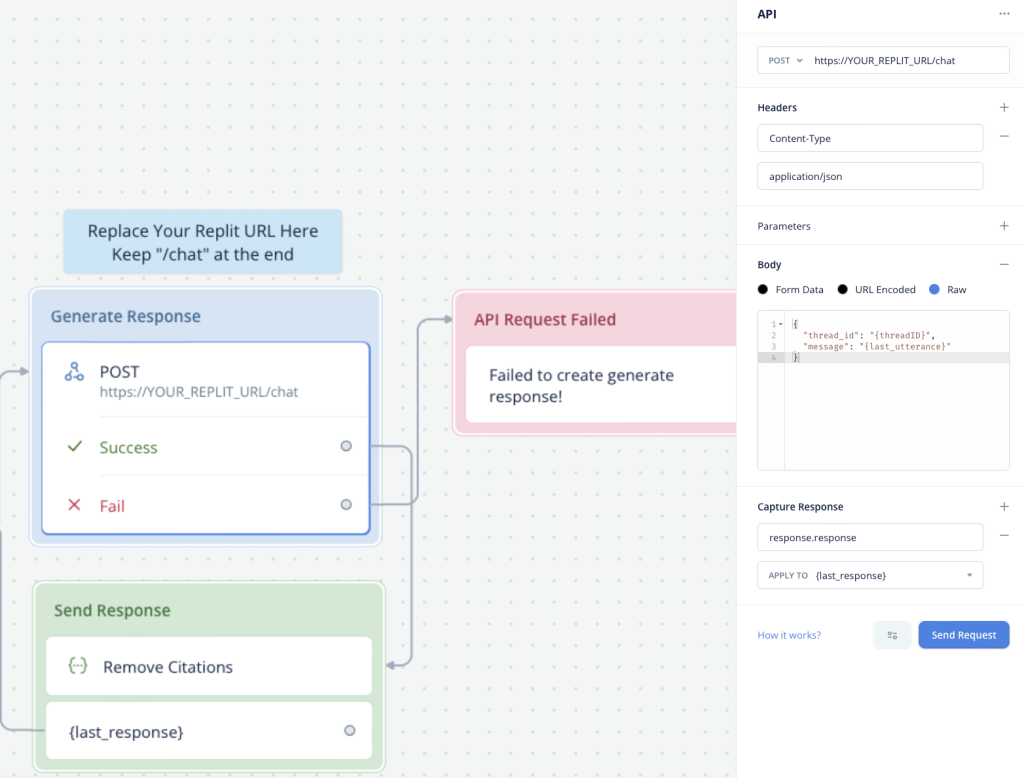
Here you should replace https://YOUR_REPLIT_URL by the link you copied after running Repl. Don’t forget to add /chat in the end.
If API call is successful chat flow proceeds to ‘Send Response’ otherwise it raises an error.
Send Response
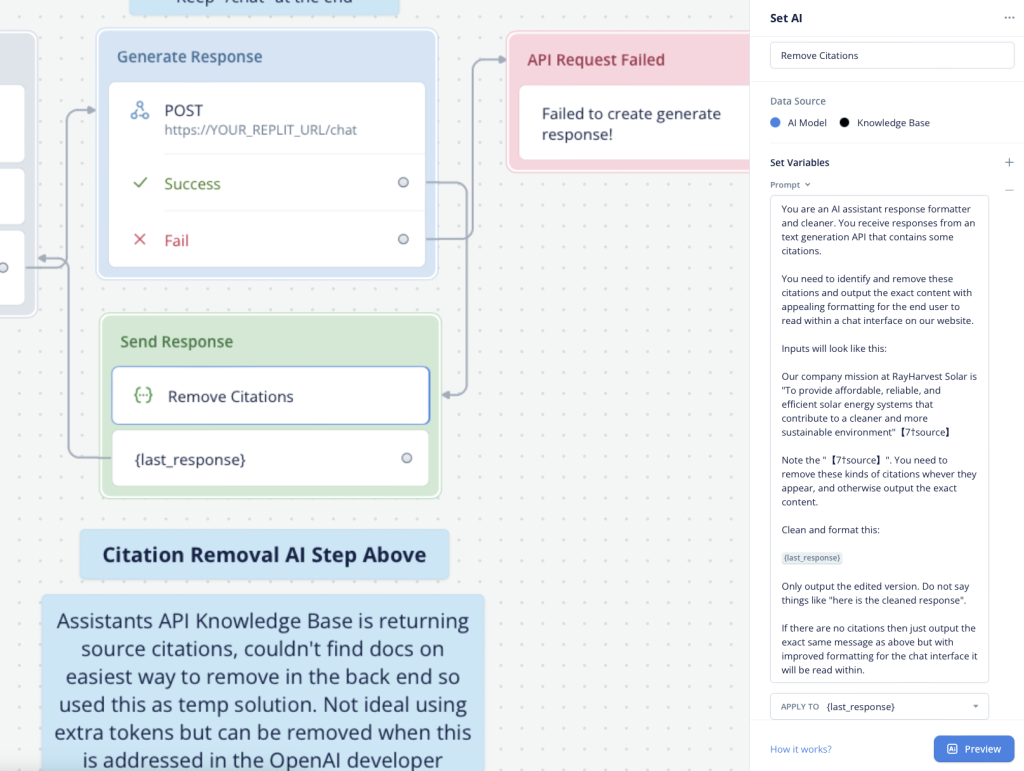
Apparently Assistants API returns source citations. Here is a quick fix to have a clean output for user without source citations. It asks AI to remove them which uses tokens. There probably is or will be an easy way to remove citations which doesn’t require additional call of AI.
The final message is then displayed to the user.
Testing
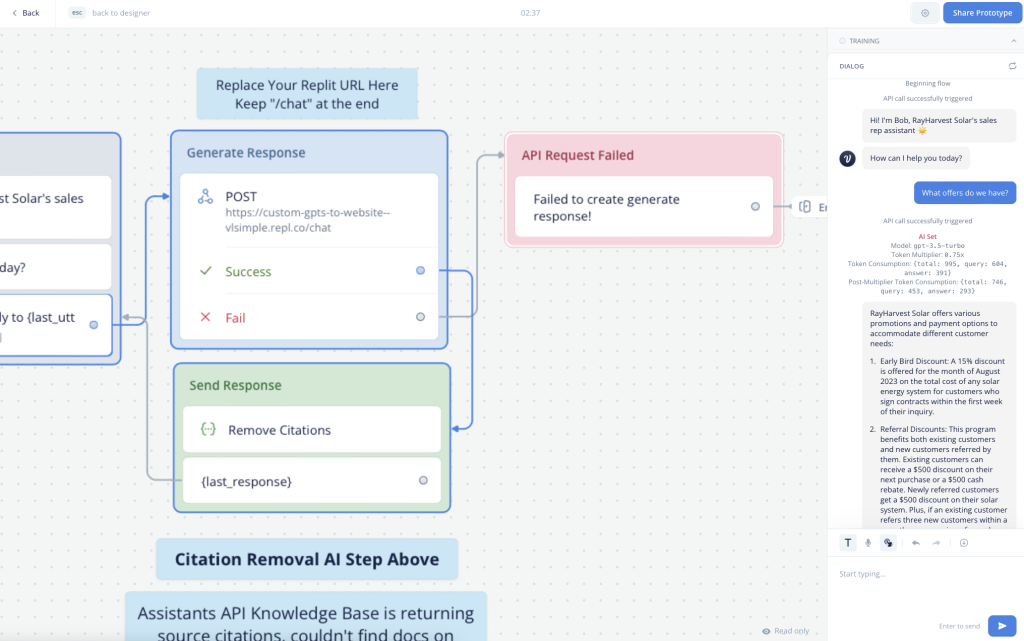
Run the chat bot and ask it a few questions. It pools answers from the knoledge base.
Back at Replit you can see output log generated by the backend. It might be helpful in case of debugging.
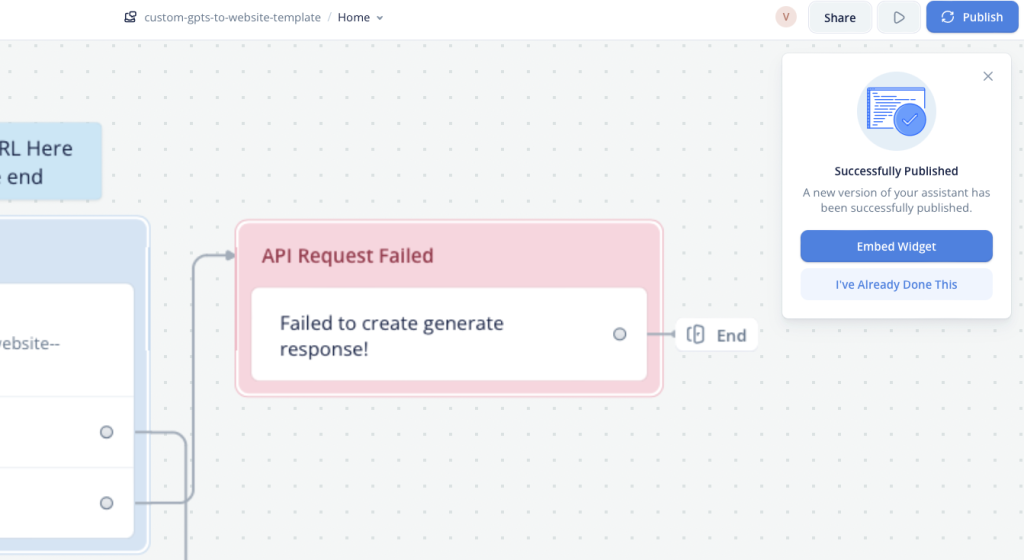
Adding chatbot to a website
In Voiceflow click Publish at the top right corner. Then click Embed Widget.
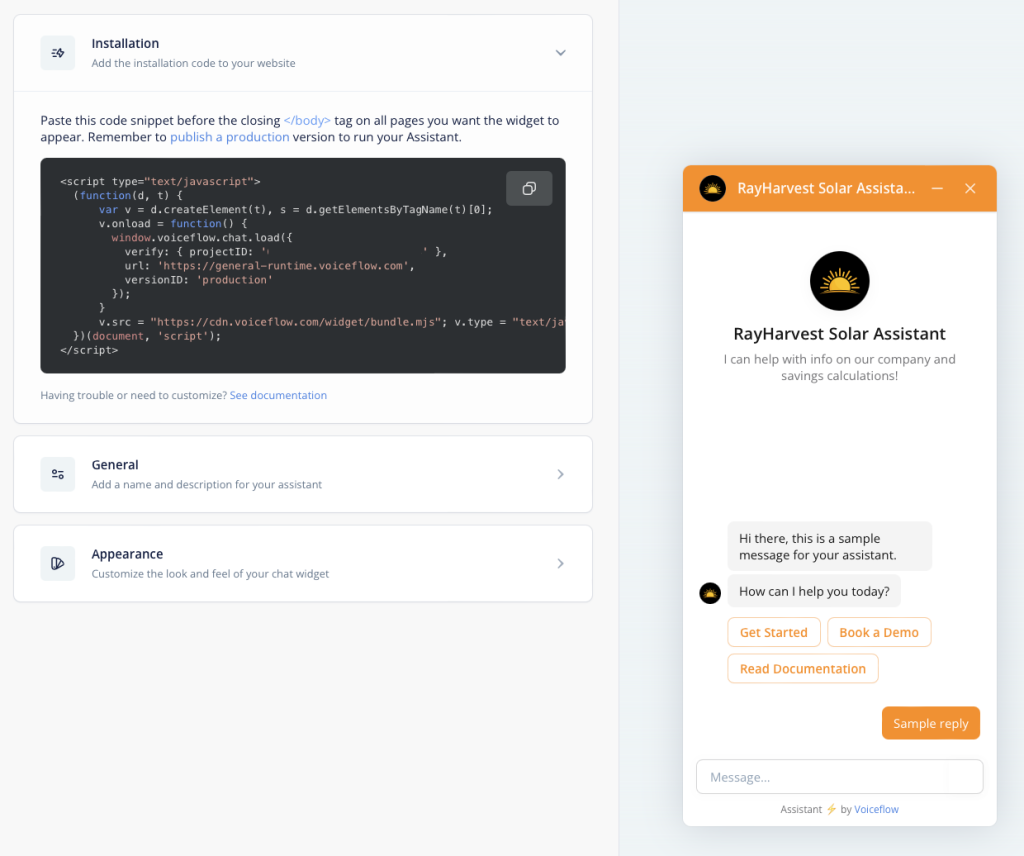
On the next page you will have a possibility to customise the appearence of you chat widget. Once you are done with customisation you should copy JavaScript code and paste it to your website. Here is a tutorial on how it can be done in case of WordPress.
Conclusions
This tutorial provides a step-by-step guide to integrating a custom GPT chatbot into any website, leveraging the capabilities of OpenAI’s Assistant API. Whether you’re a developer looking to enhance your website’s interactivity or exploring new AI-driven solutions, this guide lays the groundwork for your endeavors.
Leave a Reply
You must be logged in to post a comment.